 OpenAi-HK
OpenAI ChatGPT Application Deployment
There are many applications available in practice. Choose the one you prefer.
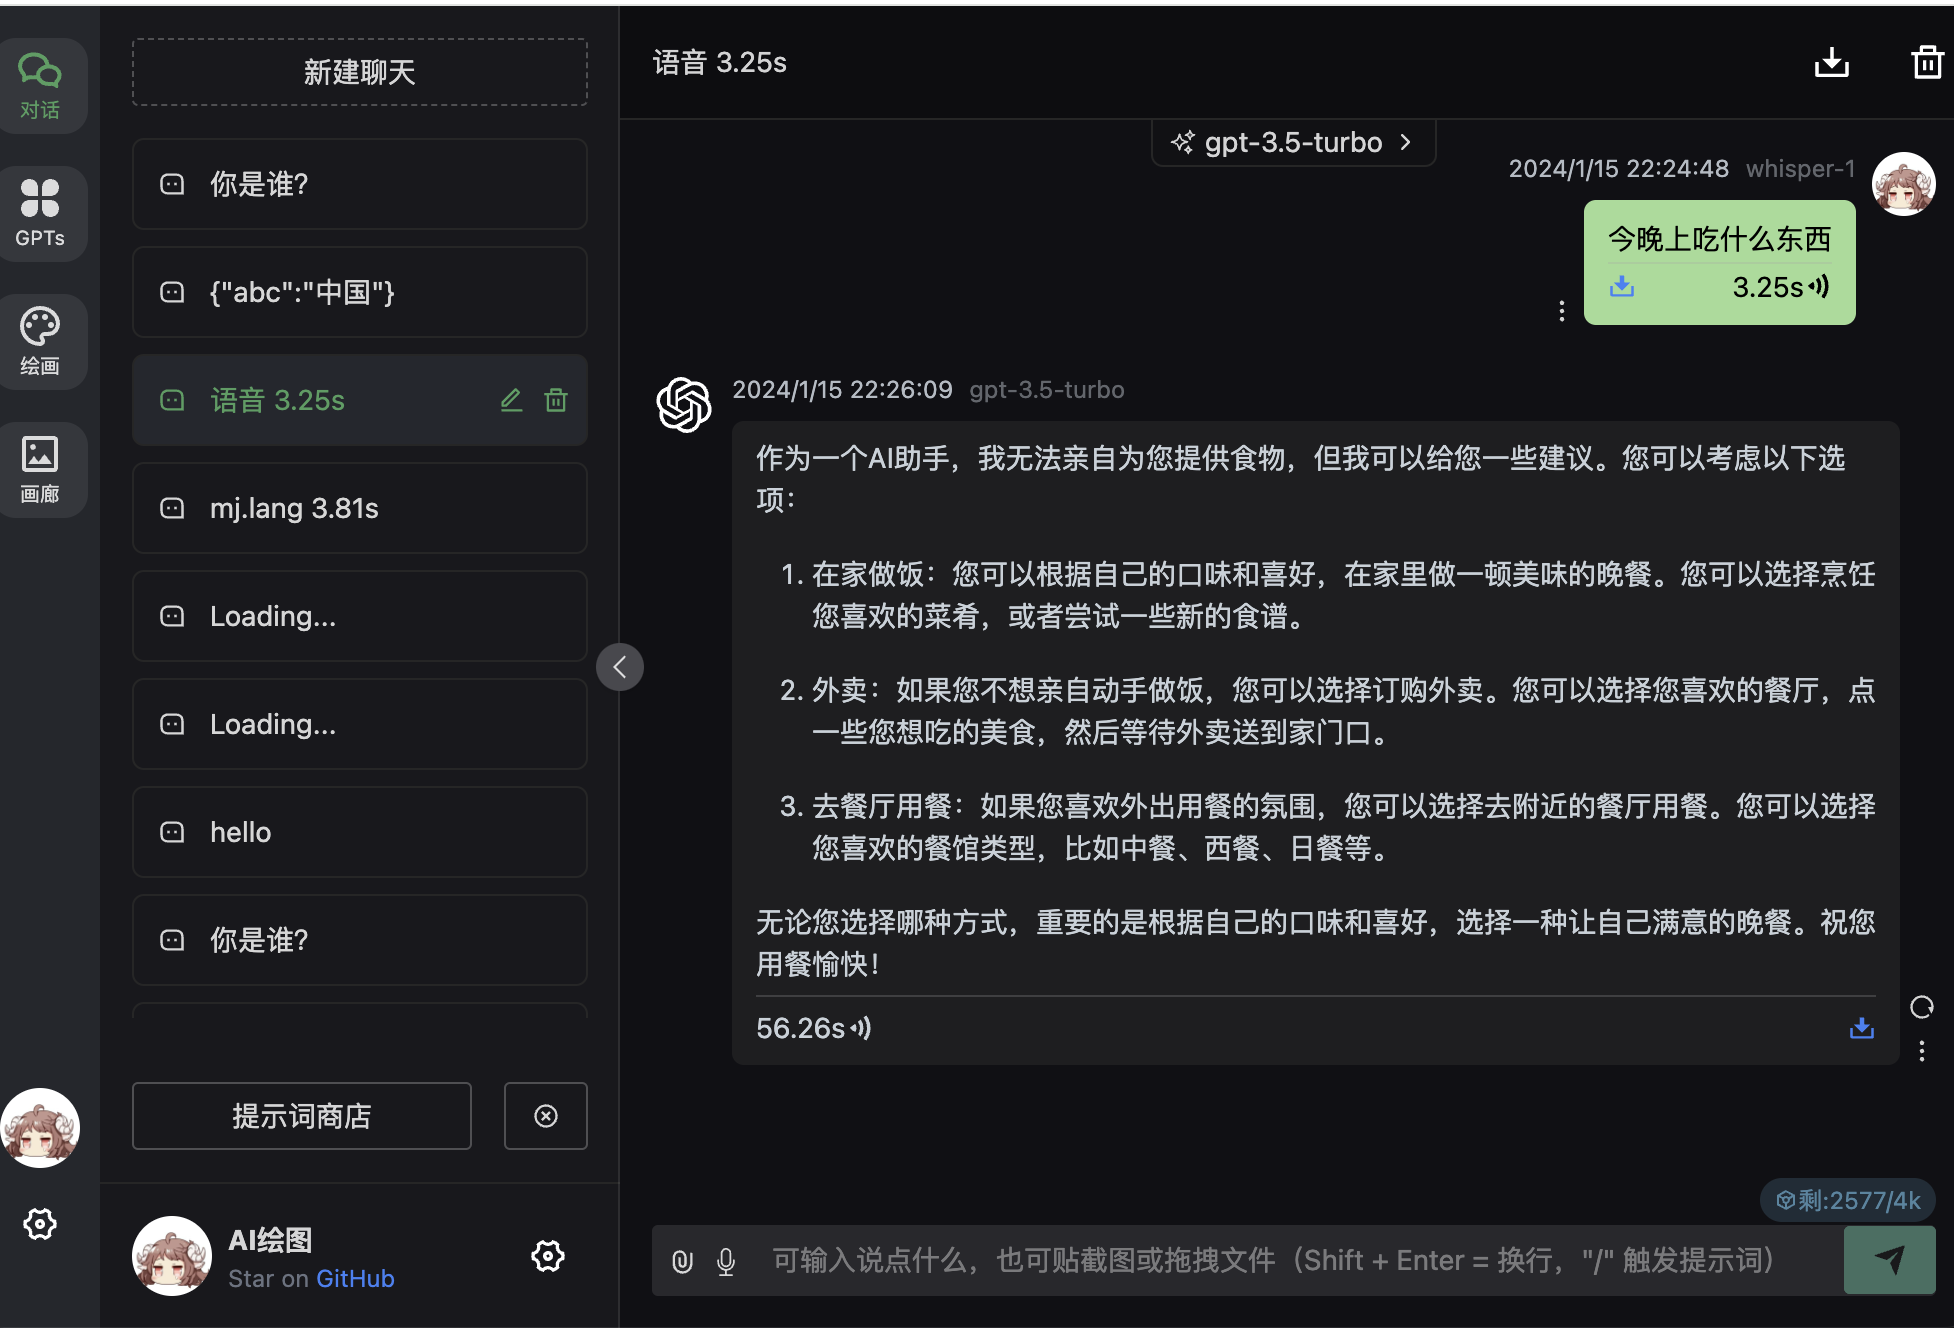
1. chatgpt-web-midjourney-proxy
- Supports both chatgpt-web and Midjourney image generation
- Supports GPTs multimodal
- Supports whisper voice input and TTS text-to-speech
- Supports image generation with
dall-eandmidjourney - Project repository
- Code: https://github.com/Dooy/chatgpt-web-midjourney-proxy
- Demo: https://vercel.ddaiai.com
Installation
docker pull ydlhero/chatgpt-web-midjourney-proxy #not needed on first install, needed for updates
docker rm -f chatgpt-web-midjourney-proxy #not needed on first install, needed for updates
docker run --name chatgpt-web-midjourney-proxy  -d -p 6015:3002 \
-e OPENAI_API_KEY=hk-your-apiKey \
-e OPENAI_API_BASE_URL=https://api.openai-hk.com  \
-e MJ_SERVER=https://api.openai-hk.com  \
-e AUTH_SECRET_KEY=access-password-letters-and-numbers  \
-e MJ_API_SECRET=hk-your-apiKey  ydlhero/chatgpt-web-midjourney-proxy
docker pull ydlhero/chatgpt-web-midjourney-proxy #not needed on first install, needed for updates
docker rm -f chatgpt-web-midjourney-proxy #not needed on first install, needed for updates
docker run --name chatgpt-web-midjourney-proxy -d -p 6015:3002 \
-e OPENAI_API_KEY=hk-your-apiKey \
-e OPENAI_API_BASE_URL=https://api.openai-hk.com \
-e MJ_SERVER=https://api.openai-hk.com \
-e AUTH_SECRET_KEY=access-password-letters-and-numbers \
-e MJ_API_SECRET=hk-your-apiKey ydlhero/chatgpt-web-midjourney-proxyThen visit http://127.0.0.1:6015
Screenshots
Input box for chat
GPTs 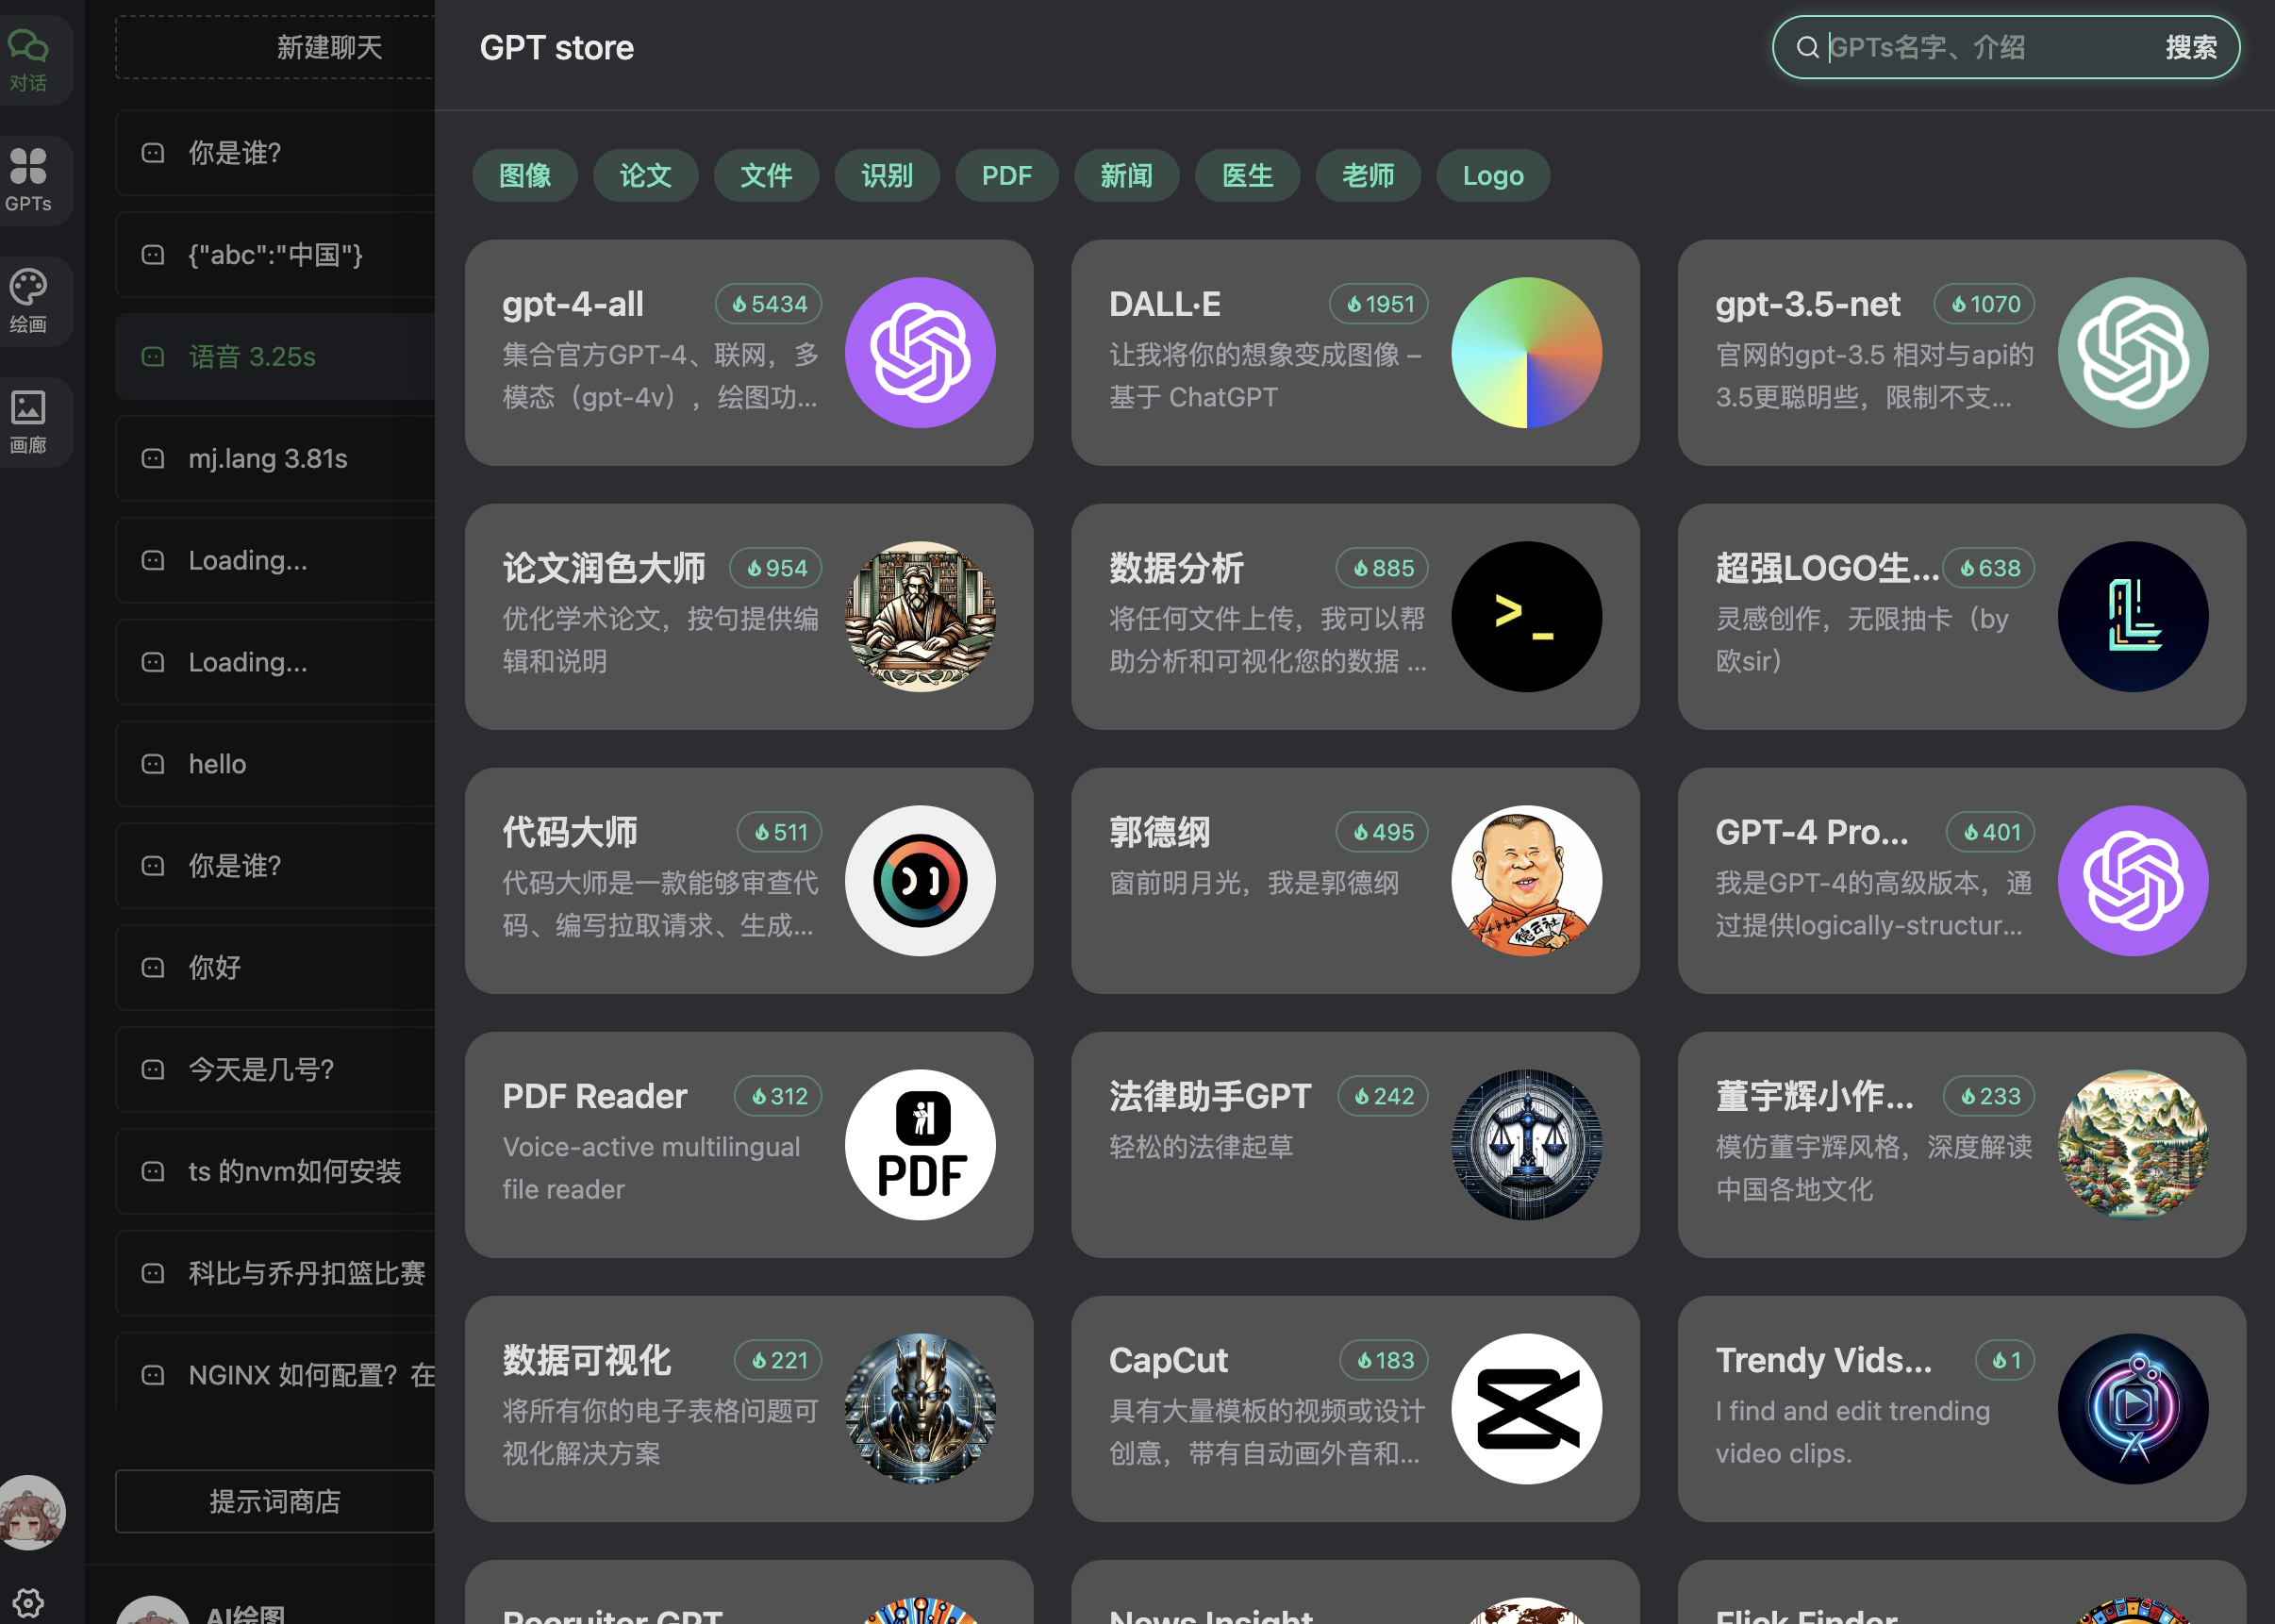
Image generation 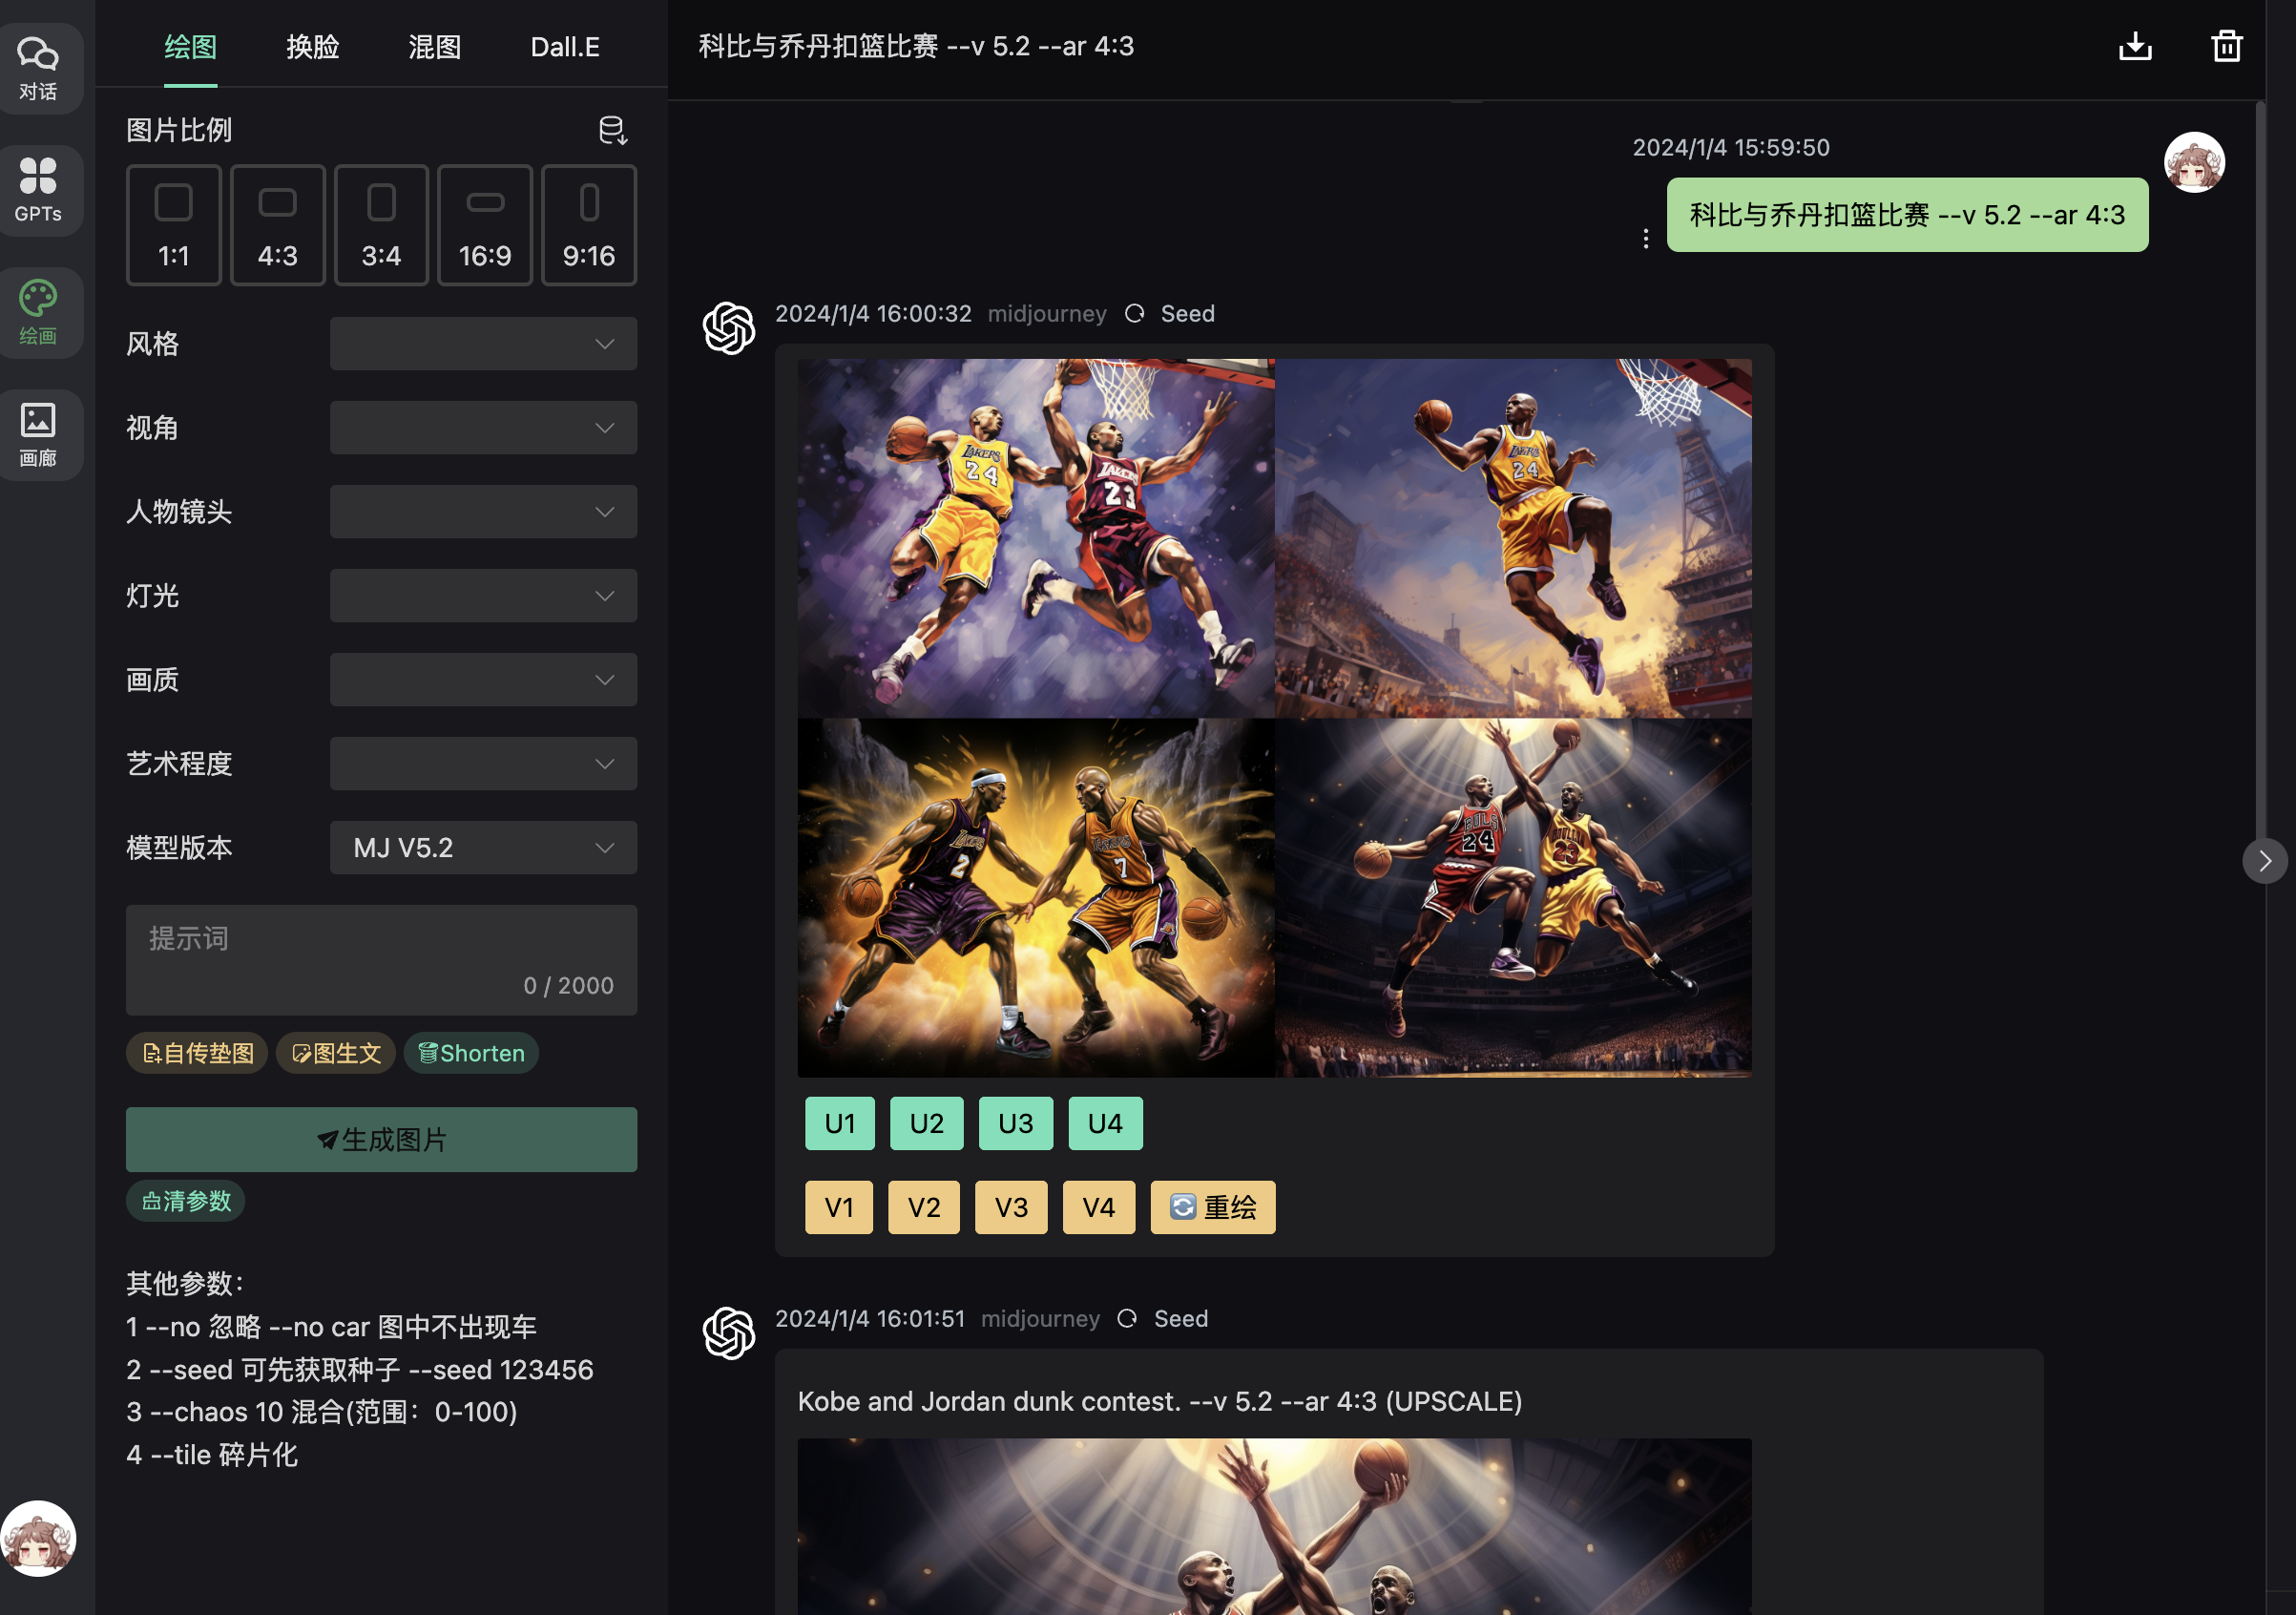
Supports model switching and custom model definitions 
2. chatgpt-web
Docker startup — default model is gpt-3.5
docker run --name chatgpt-web -d -p 6011:3002 \
--env OPENAI_API_KEY=hk-replace-with-your-key \
--env TIMEOUT_MS=600000  --env OPENAI_MAX_TOKEN=1000 \
--env OPENAI_API_BASE_URL=https://api.openai-hk.com  chenzhaoyu94/chatgpt-web
docker run --name chatgpt-web -d -p 6011:3002 \
--env OPENAI_API_KEY=hk-replace-with-your-key \
--env TIMEOUT_MS=600000 --env OPENAI_MAX_TOKEN=1000 \
--env OPENAI_API_BASE_URL=https://api.openai-hk.com chenzhaoyu94/chatgpt-webThen visit http://127.0.0.1:6011
chatgpt-web gpt-4
- The default model is gpt-3.5. To start with gpt-4.0 as the default, use the environment variable
OPENAI_API_MODEL
docker run --name chatgpt-web -d -p 6040:3002 \
--env OPENAI_API_KEY=hk-replace-with-your-key \
--env TIMEOUT_MS=600000  --env OPENAI_MAX_TOKEN=1000 \
--env OPENAI_API_MODEL=gpt-4-0613 \
--env OPENAI_API_BASE_URL=https://api.openai-hk.com  chenzhaoyu94/chatgpt-web
docker run --name chatgpt-web -d -p 6040:3002 \
--env OPENAI_API_KEY=hk-replace-with-your-key \
--env TIMEOUT_MS=600000 --env OPENAI_MAX_TOKEN=1000 \
--env OPENAI_API_MODEL=gpt-4-0613 \
--env OPENAI_API_BASE_URL=https://api.openai-hk.com chenzhaoyu94/chatgpt-webThen visit http://127.0.0.1:6040
Preview 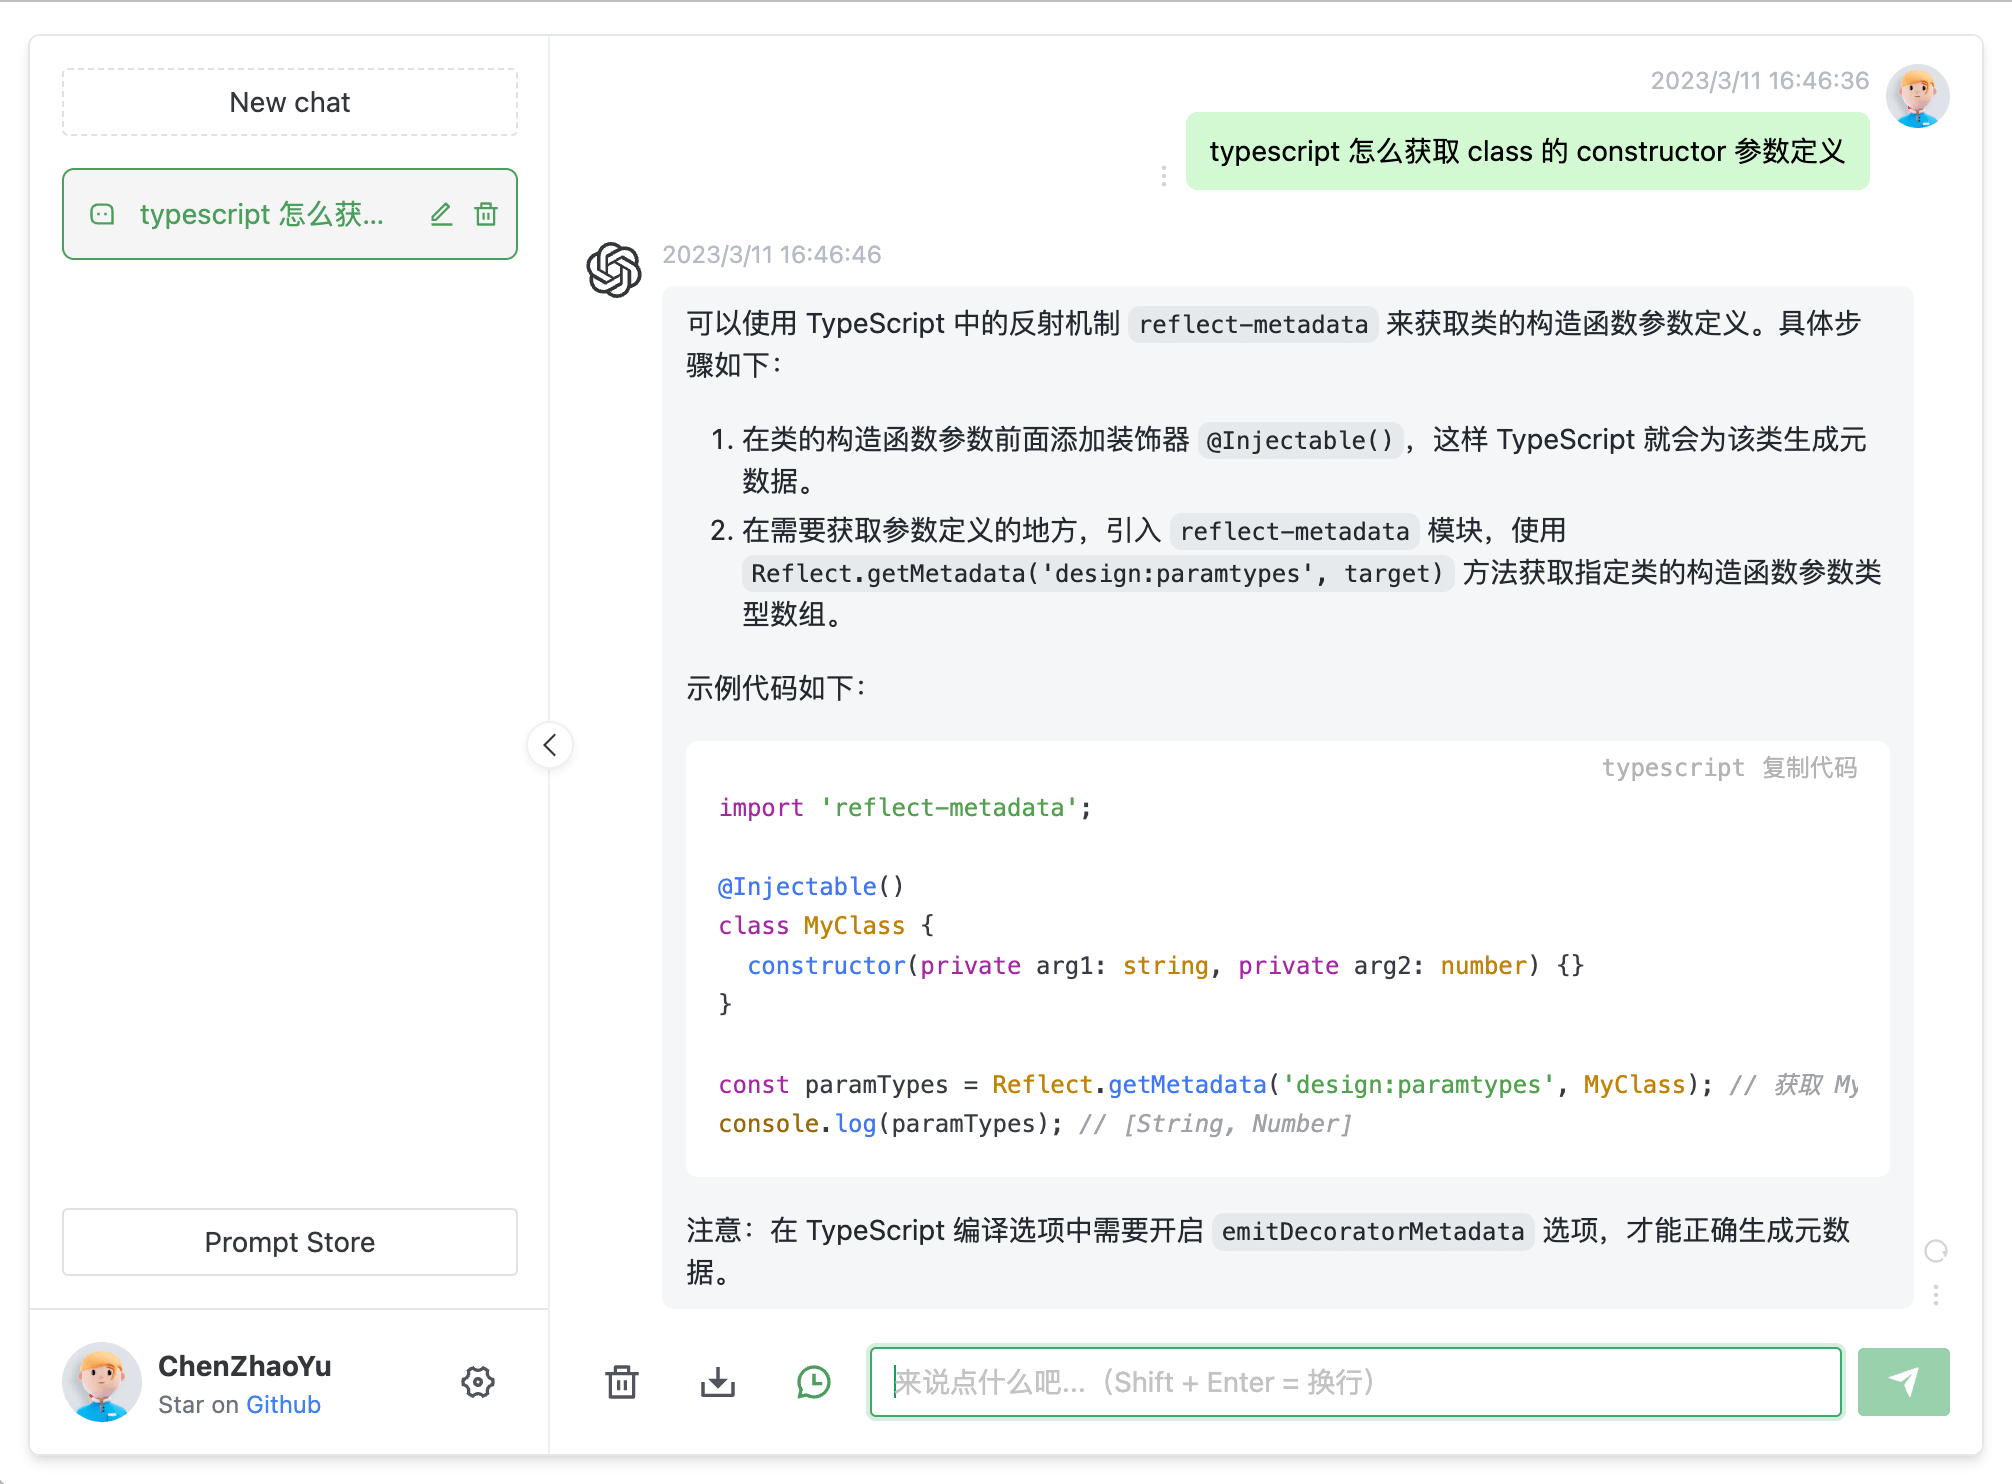
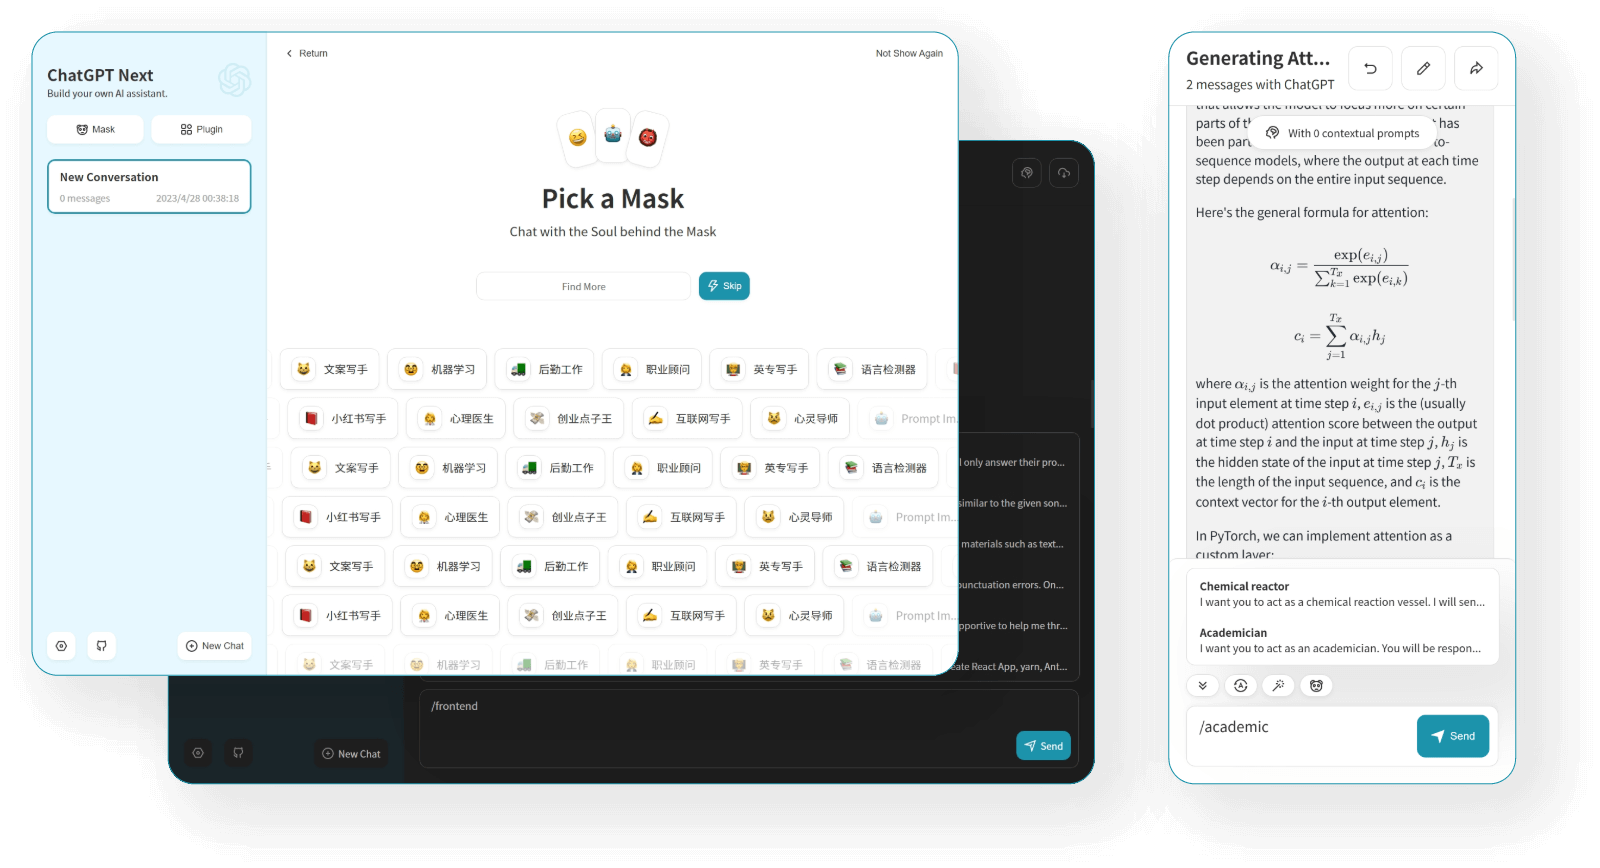
3. chatgpt-next-web
Supports multiple models with a high degree of customization
docker run  --name chatgpt-next-web   -d -p 6013:3000 \
   -e OPENAI_API_KEY="hk-replace-with-your-key" \
   -e BASE_URL=https://api.openai-hk.com   yidadaa/chatgpt-next-web
docker run --name chatgpt-next-web -d -p 6013:3000 \
-e OPENAI_API_KEY="hk-replace-with-your-key" \
-e BASE_URL=https://api.openai-hk.com yidadaa/chatgpt-next-webThen visit http://127.0.0.1:6013
Preview
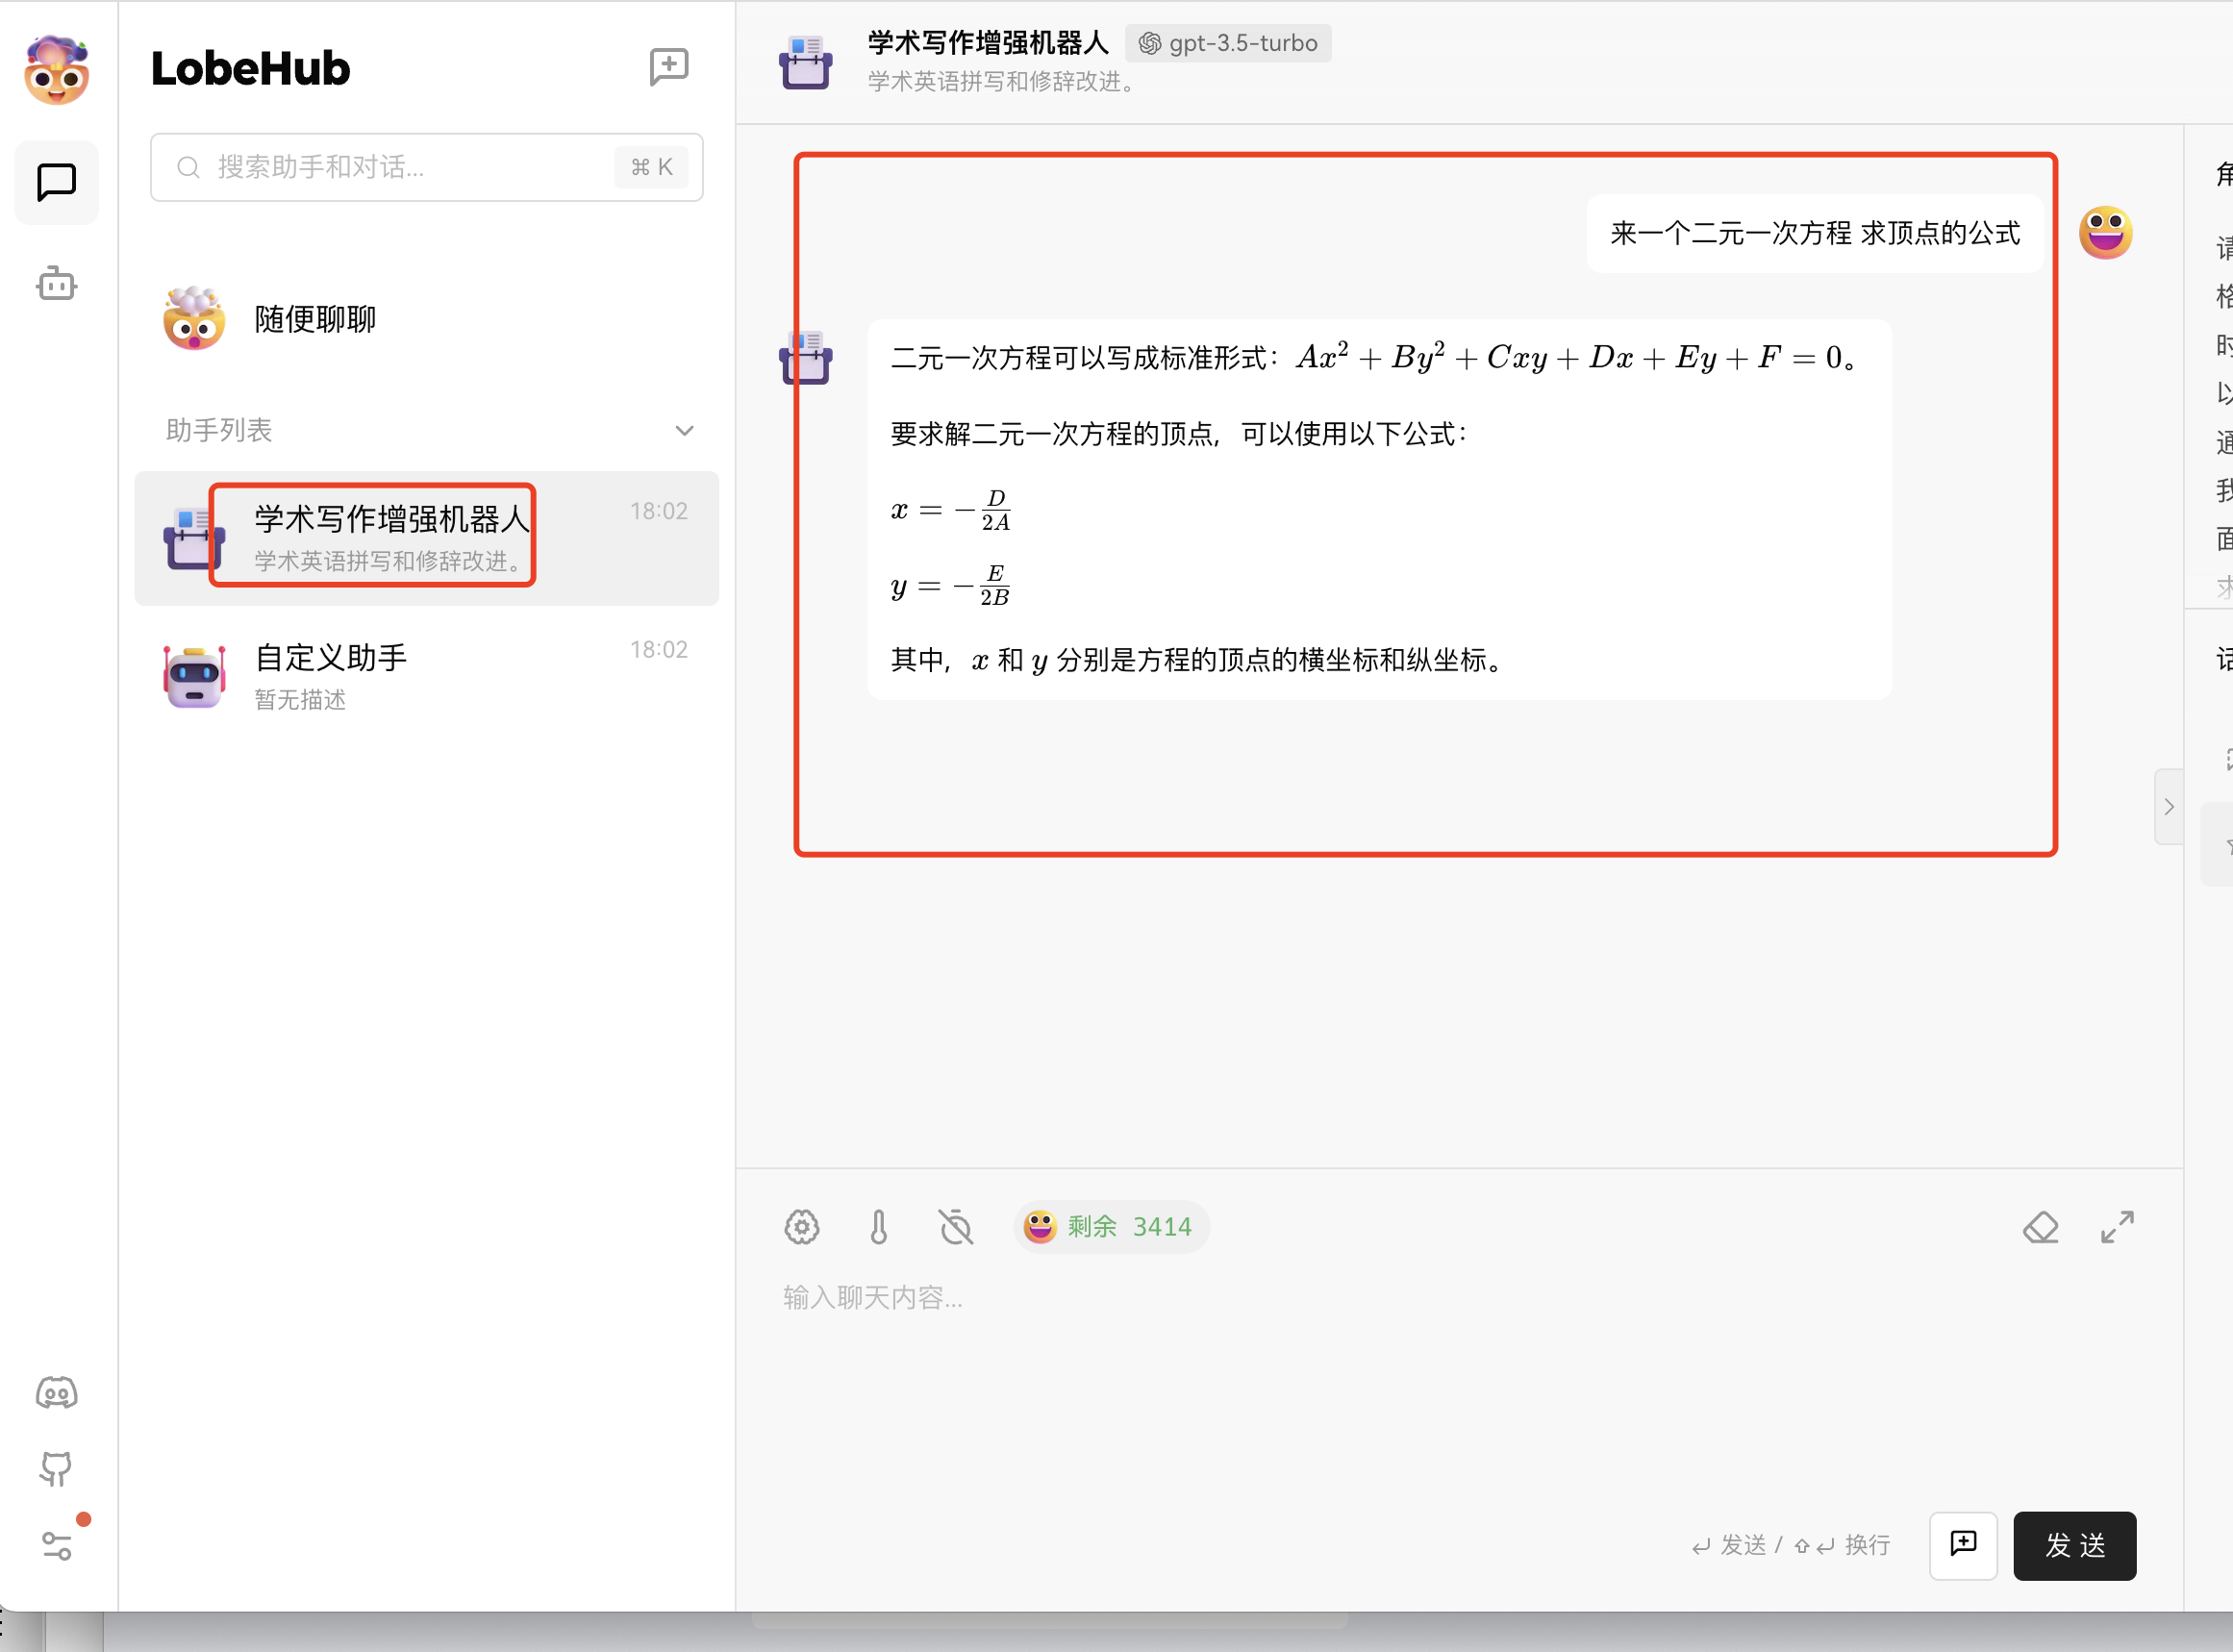
4. Lobehub lobe-chat — Academic writing, formulas, and charts
Great support for math formulas, includes various prompt templates packaged as apps
docker run   --name lobe-chat  -d -p 6021:3210 \
  -e OPENAI_API_KEY=hk-replace-with-your-key \
  -e OPENAI_PROXY_URL=https://api.openai-hk.com/v1 \
  lobehub/lobe-chat
docker run   --name lobe-chat  -d -p 6021:3210 \
  -e OPENAI_API_KEY=hk-replace-with-your-key \
  -e OPENAI_PROXY_URL=https://api.openai-hk.com/v1 \
lobehub/lobe-chatThen visit http://127.0.0.1:6021
Preview
5. gpt_academic
- Project repository
- Clone and enter the project, then modify the config.py configuration file
git clone --depth=1 https://github.com/binary-husky/gpt_academic.git
cd gpt_academic
git clone --depth=1 https://github.com/binary-husky/gpt_academic.git
cd gpt_academicModify the config.py file
# Your key starts with hk-, but the system also supports sk- prefix (just replace hk with sk)
API_KEY = "sk-your-key"
# The important part is modifying this
API_URL_REDIRECT = {"https://api.openai.com/v1/chat/completions": "https://api.openai-hk.com/v1/chat/completions"}
# Your key starts with hk-, but the system also supports sk- prefix (just replace hk with sk)
API_KEY = "sk-your-key"
# The important part is modifying this
API_URL_REDIRECT = {"https://api.openai.com/v1/chat/completions": "https://api.openai-hk.com/v1/chat/completions"}Then follow the official documentation to run it.
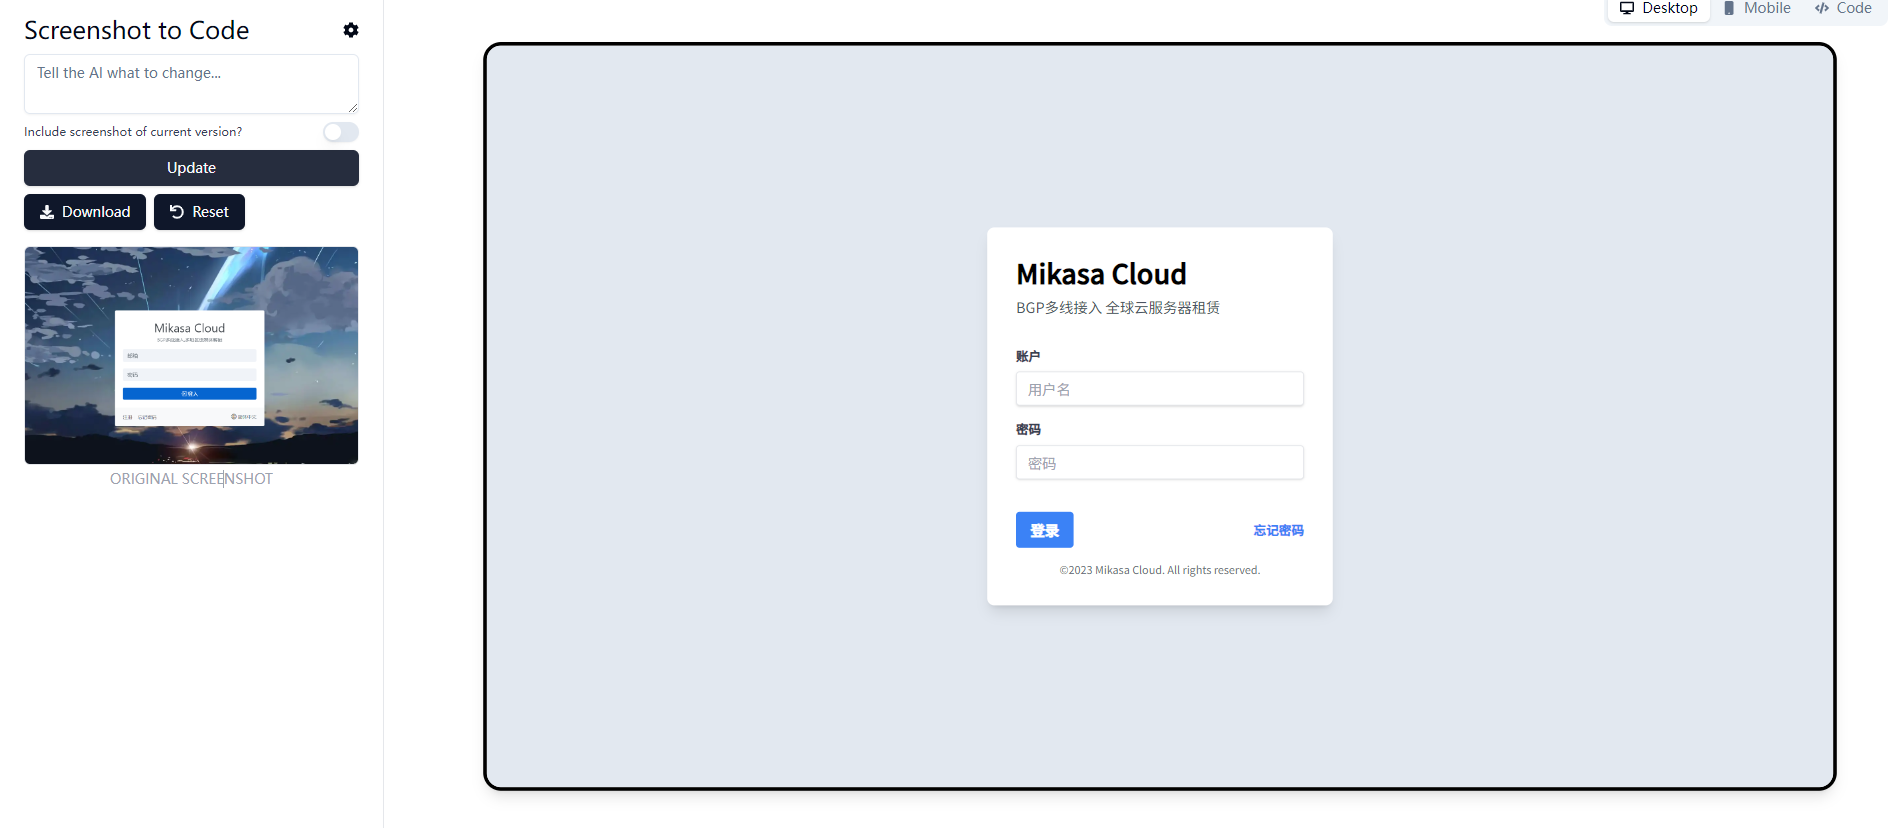
6. screenshot-to-code
- Project repository
- At the GPT-4 product launch, OpenAI's CTO casually swapped in an image and GPT-4 turned it into a webpage. This open-source project currently has the best support for that.
- Requires
gpt-4-vision-previewsupport
git clone --depth=1 https://github.com/abi/screenshot-to-code.git
cd screenshot-to-code
git clone --depth=1 https://github.com/abi/screenshot-to-code.git
cd screenshot-to-codeAdd the following to the .env file (create it if it doesn't exist)
OPENAI_API_KEY=hk-your-key
OPEN_AI_BASE=https://api.openai-hk.com
OPENAI_API_BASE=https://api.openai-hk.com
OPENAI_API_KEY=hk-your-key
OPEN_AI_BASE=https://api.openai-hk.com
OPENAI_API_BASE=https://api.openai-hk.comThe important part is modifying one line of code
#Go to  backend/llm.py
#Find line 14
client = AsyncOpenAI(api_key=api_key, base_url=base_url)
#Change it to
client = AsyncOpenAI(api_key=api_key, base_url="https://api.openai-hk.com/v1")
#Go to backend/llm.py
#Find line 14
client = AsyncOpenAI(api_key=api_key, base_url=base_url)
#Change it to
client = AsyncOpenAI(api_key=api_key, base_url="https://api.openai-hk.com/v1")Docker build
docker-compose up -d --build
#If the above command doesn't work, try
docker compose up -d --build
docker-compose up -d --build
#If the above command doesn't work, try
docker compose up -d --buildVisit http://localhost:5173 to see the result. Note that it only supports local access by default; remote access requires modifying the configuration or code yourself.
Try uploading a webpage screenshot and it will generate the code for you.
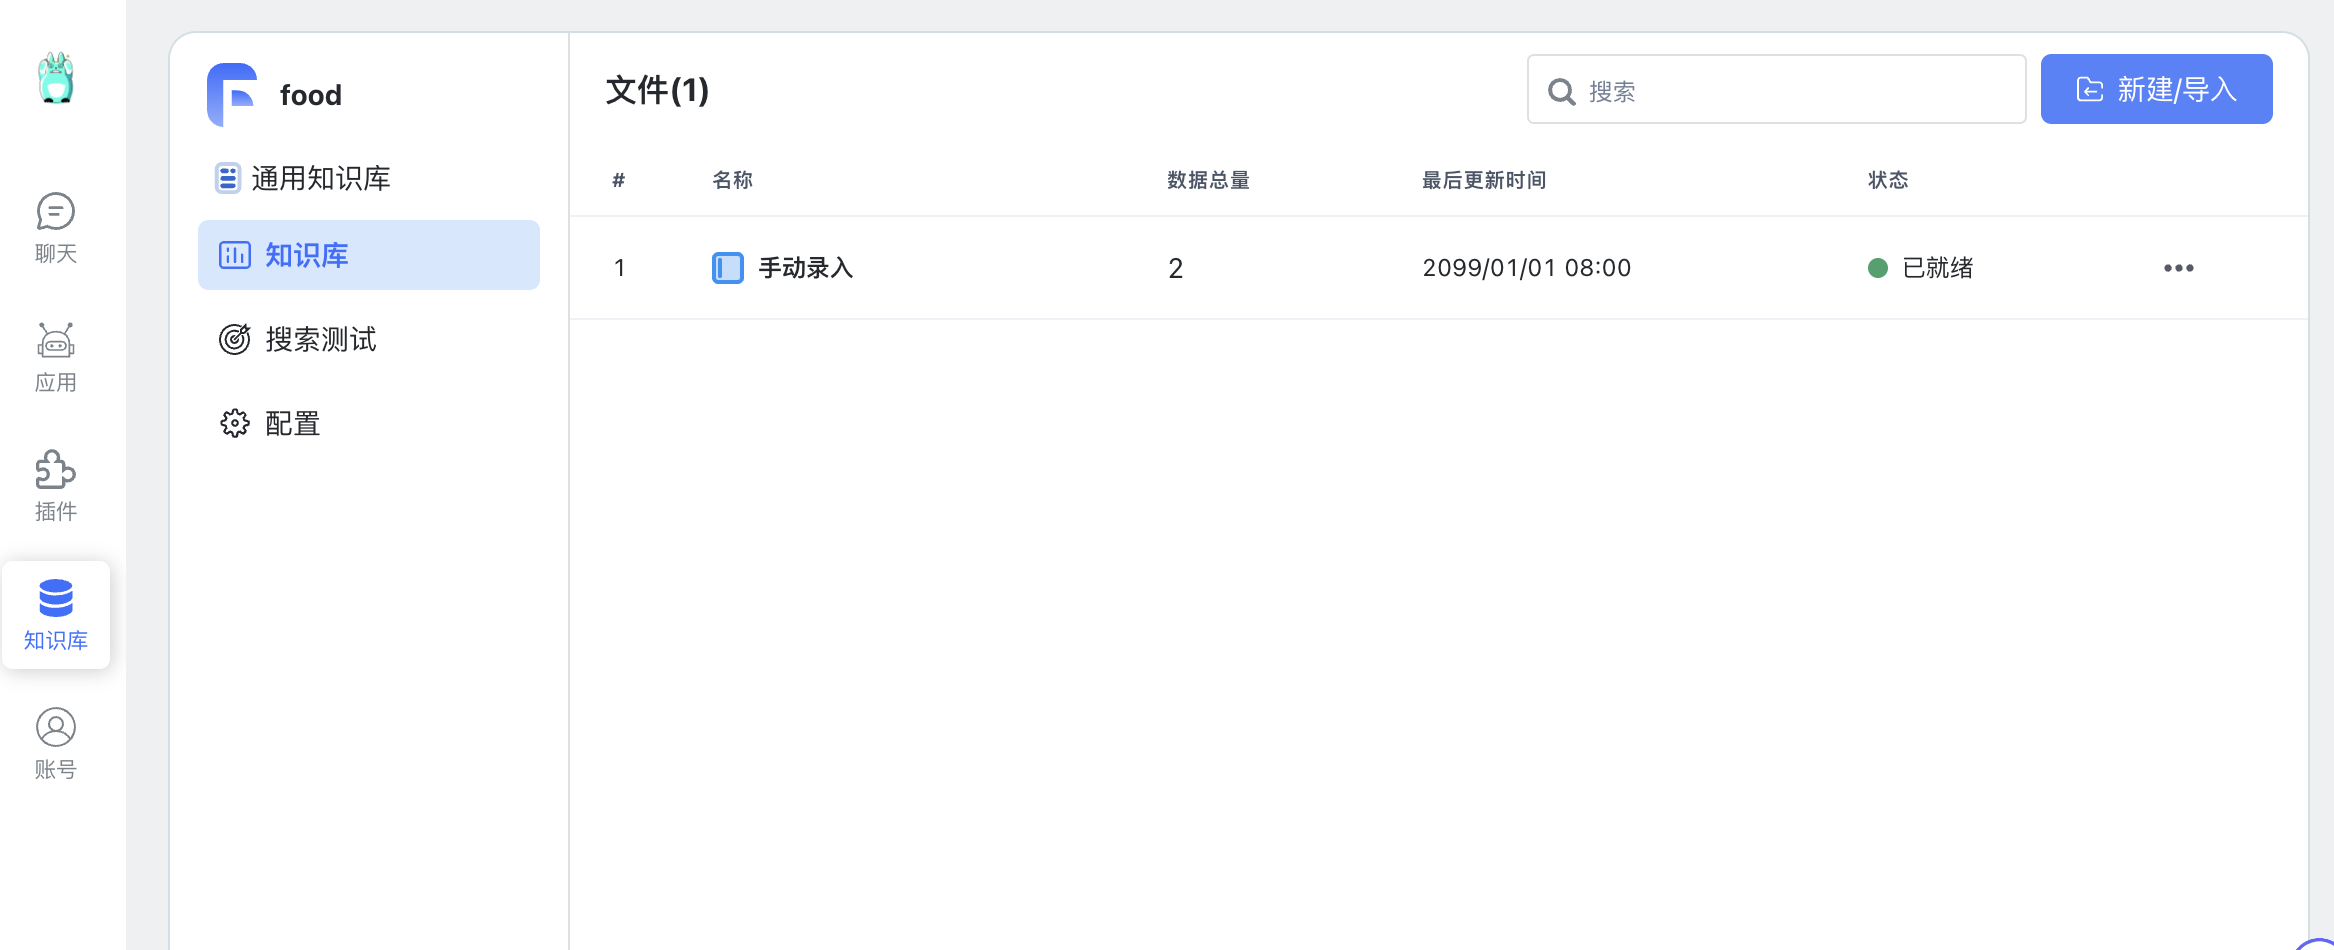
7. FastGPT
- Project repository
- Code: https://github.com/labring/FastGPT
- Build your own knowledge base
- Setup documentation
Download the deployment and configuration files
mkdir fastgpt
cd fastgpt
curl -O https://raw.githubusercontent.com/labring/FastGPT/main/files/deploy/fastgpt/docker-compose.yml
curl -O https://raw.githubusercontent.com/labring/FastGPT/main/projects/app/data/config.json
mkdir fastgpt
cd fastgpt
curl -O https://raw.githubusercontent.com/labring/FastGPT/main/files/deploy/fastgpt/docker-compose.yml
curl -O https://raw.githubusercontent.com/labring/FastGPT/main/projects/app/data/config.jsonModify the deployment configuration file docker-compose.yml
#Find lines 51-52
     - OPENAI_BASE_URL=https://api.openai-hk.com/v1
     - CHAT_API_KEY=hk-your-key
#Find lines 51-52
- OPENAI_BASE_URL=https://api.openai-hk.com/v1
- CHAT_API_KEY=hk-your-keyRun the installation and startup commands
# Enter the project directory
cd fastgpt
# Create the mongo key
openssl rand -base64 756 > ./mongodb.key
# If 600 doesn't work, try chmod 999
chmod 600 ./mongodb.key
chown 999:root ./mongodb.key
# Start the containers
docker-compose pull
docker-compose up -d
# Enter the project directory
cd fastgpt
# Create the mongo key
openssl rand -base64 756 > ./mongodb.key
# If 600 doesn't work, try chmod 999
chmod 600 ./mongodb.key
chown 999:root ./mongodb.key
# Start the containers
docker-compose pull
docker-compose up -dInitialize the Mongo replica set
# Check if the mongo container is running normally
docker ps
# Enter the container
docker exec -it mongo bash

# Connect to the database
mongo -u myname -p mypassword --authenticationDatabase admin

# Initialize the replica set. If you need external access, change mongo:27017 to ip:27017.
# You also need to update the FastGPT connection parameter accordingly
# (MONGODB_URI=mongodb://myname:mypassword@mongo:27017/fastgpt?authSource=admin => MONGODB_URI=mongodb://myname:mypassword@ip:27017/fastgpt?authSource=admin)
rs.initiate({
  _id: "rs0",
  members: [
    { _id: 0, host: "mongo:27017" }
  ]
})
# Check status. If it shows rs0 status, the replica set is running successfully
rs.status()
# Check if the mongo container is running normally
docker ps
# Enter the container
docker exec -it mongo bash
# Connect to the database
mongo -u myname -p mypassword --authenticationDatabase admin
# Initialize the replica set. If you need external access, change mongo:27017 to ip:27017.
# You also need to update the FastGPT connection parameter accordingly
# (MONGODB_URI=mongodb://myname:mypassword@mongo:27017/fastgpt?authSource=admin => MONGODB_URI=mongodb://myname:mypassword@ip:27017/fastgpt?authSource=admin)
rs.initiate({
_id: "rs0",
members: [
{ _id: 0, host: "mongo:27017" }
]
})
# Check status. If it shows rs0 status, the replica set is running successfully
rs.status()Visit http://ip:3000 — the default username and password are root 1234. To change them, modify DEFAULT_ROOT_PSW in docker-compose.yml.
For personal use, go to Account -> Personal Info -> openai/oneapi account settings 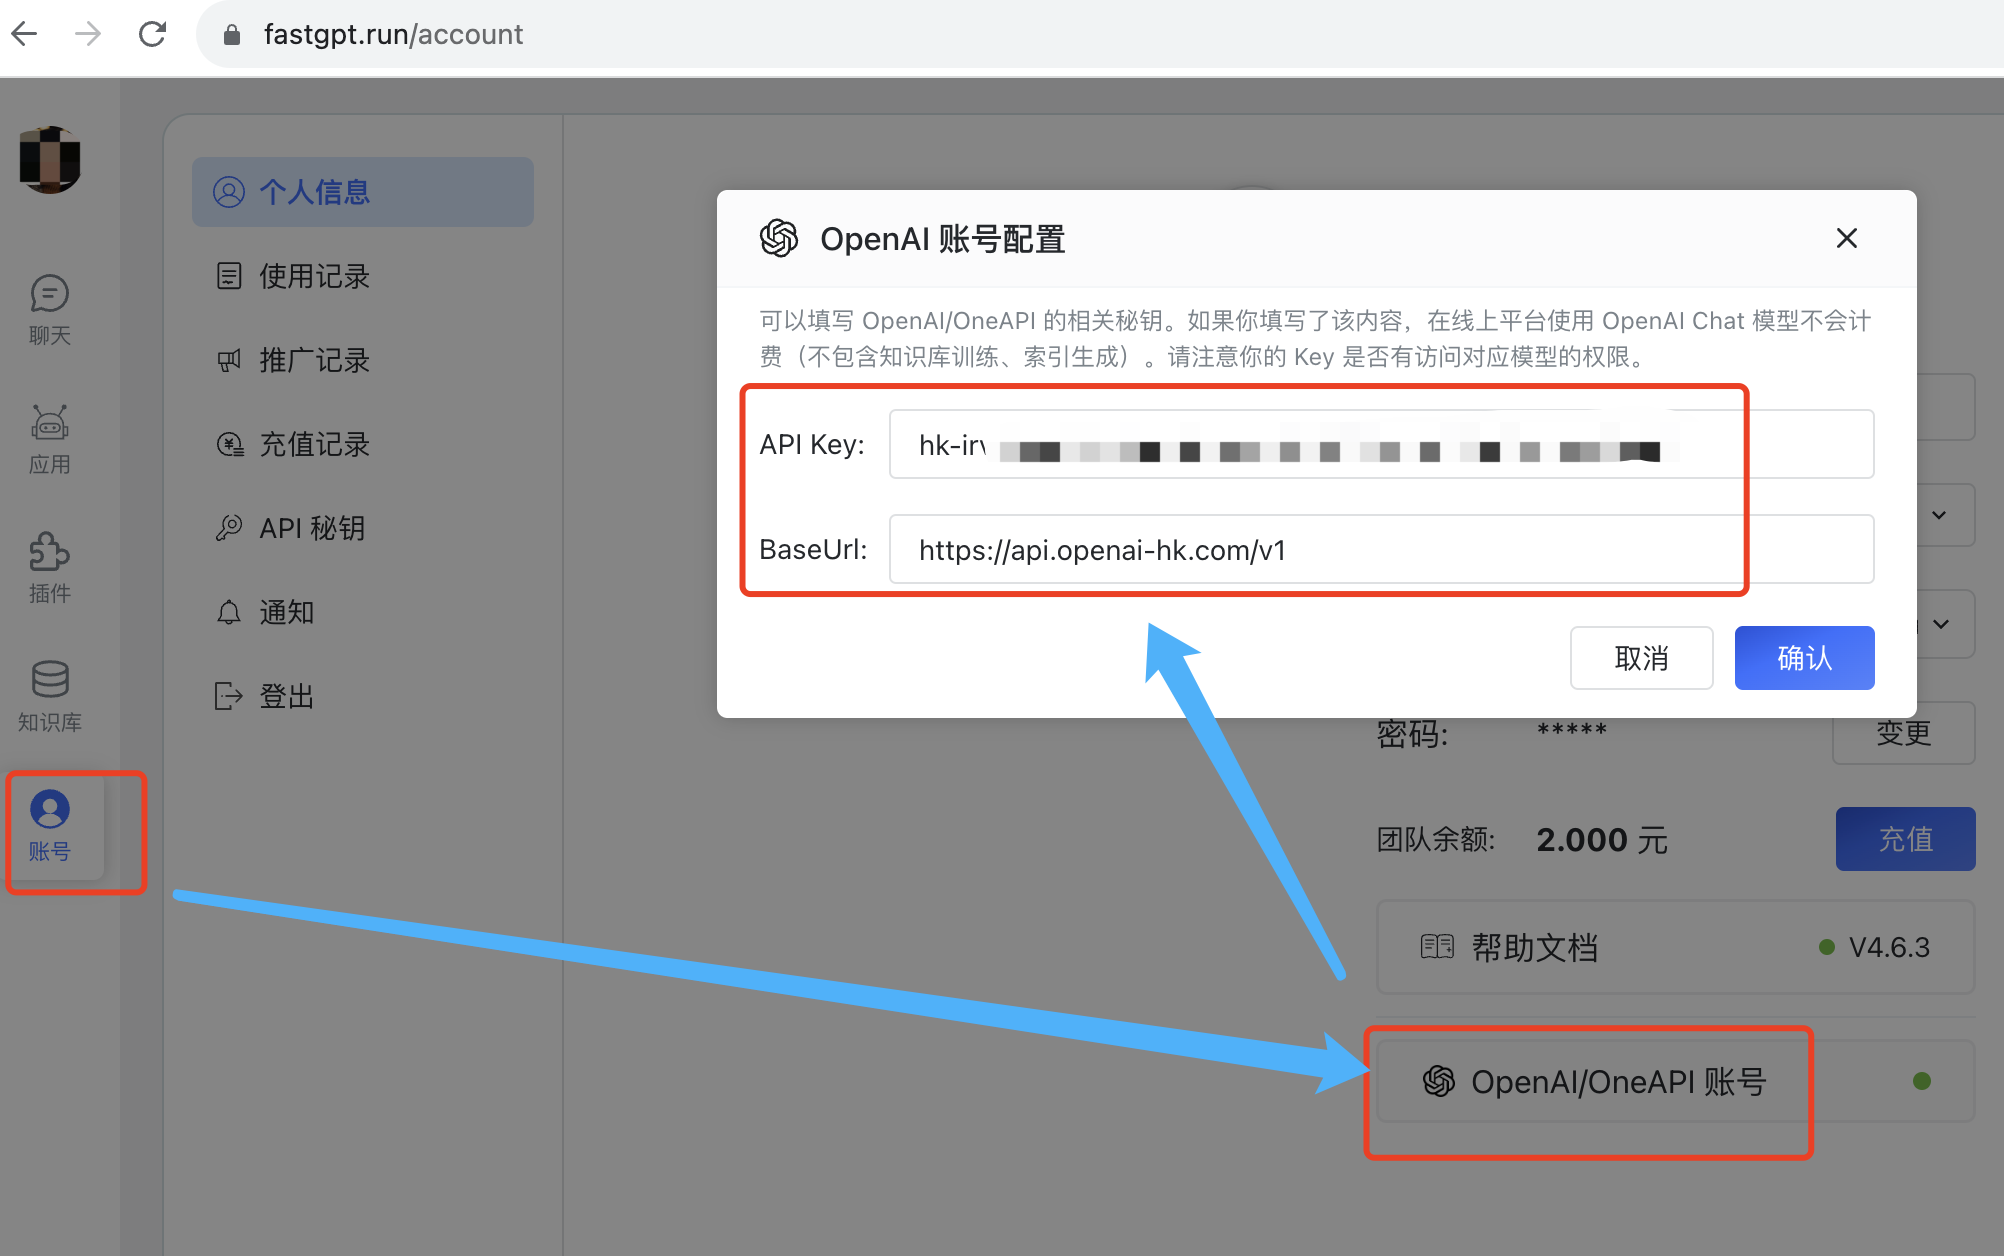
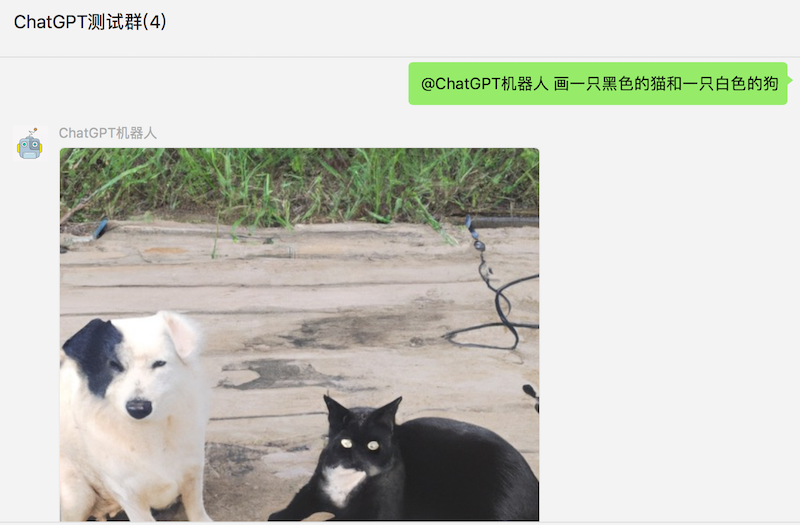
8. chatgpt-on-wechat
- Project repository
- Code: https://github.com/zhayujie/chatgpt-on-wechat
- Build your own WeChat bot
Modify the config.json configuration file: cp config.example.json config.json
{
 "open_ai_api_key": "hk-your-key",
 "open_ai_api_base": "https://api.openai-hk.com/v1", //add this if it doesn't exist
}
{
"open_ai_api_key": "hk-your-key",
"open_ai_api_base": "https://api.openai-hk.com/v1", //add this if it doesn't exist
}Then follow the official documentation to run it. 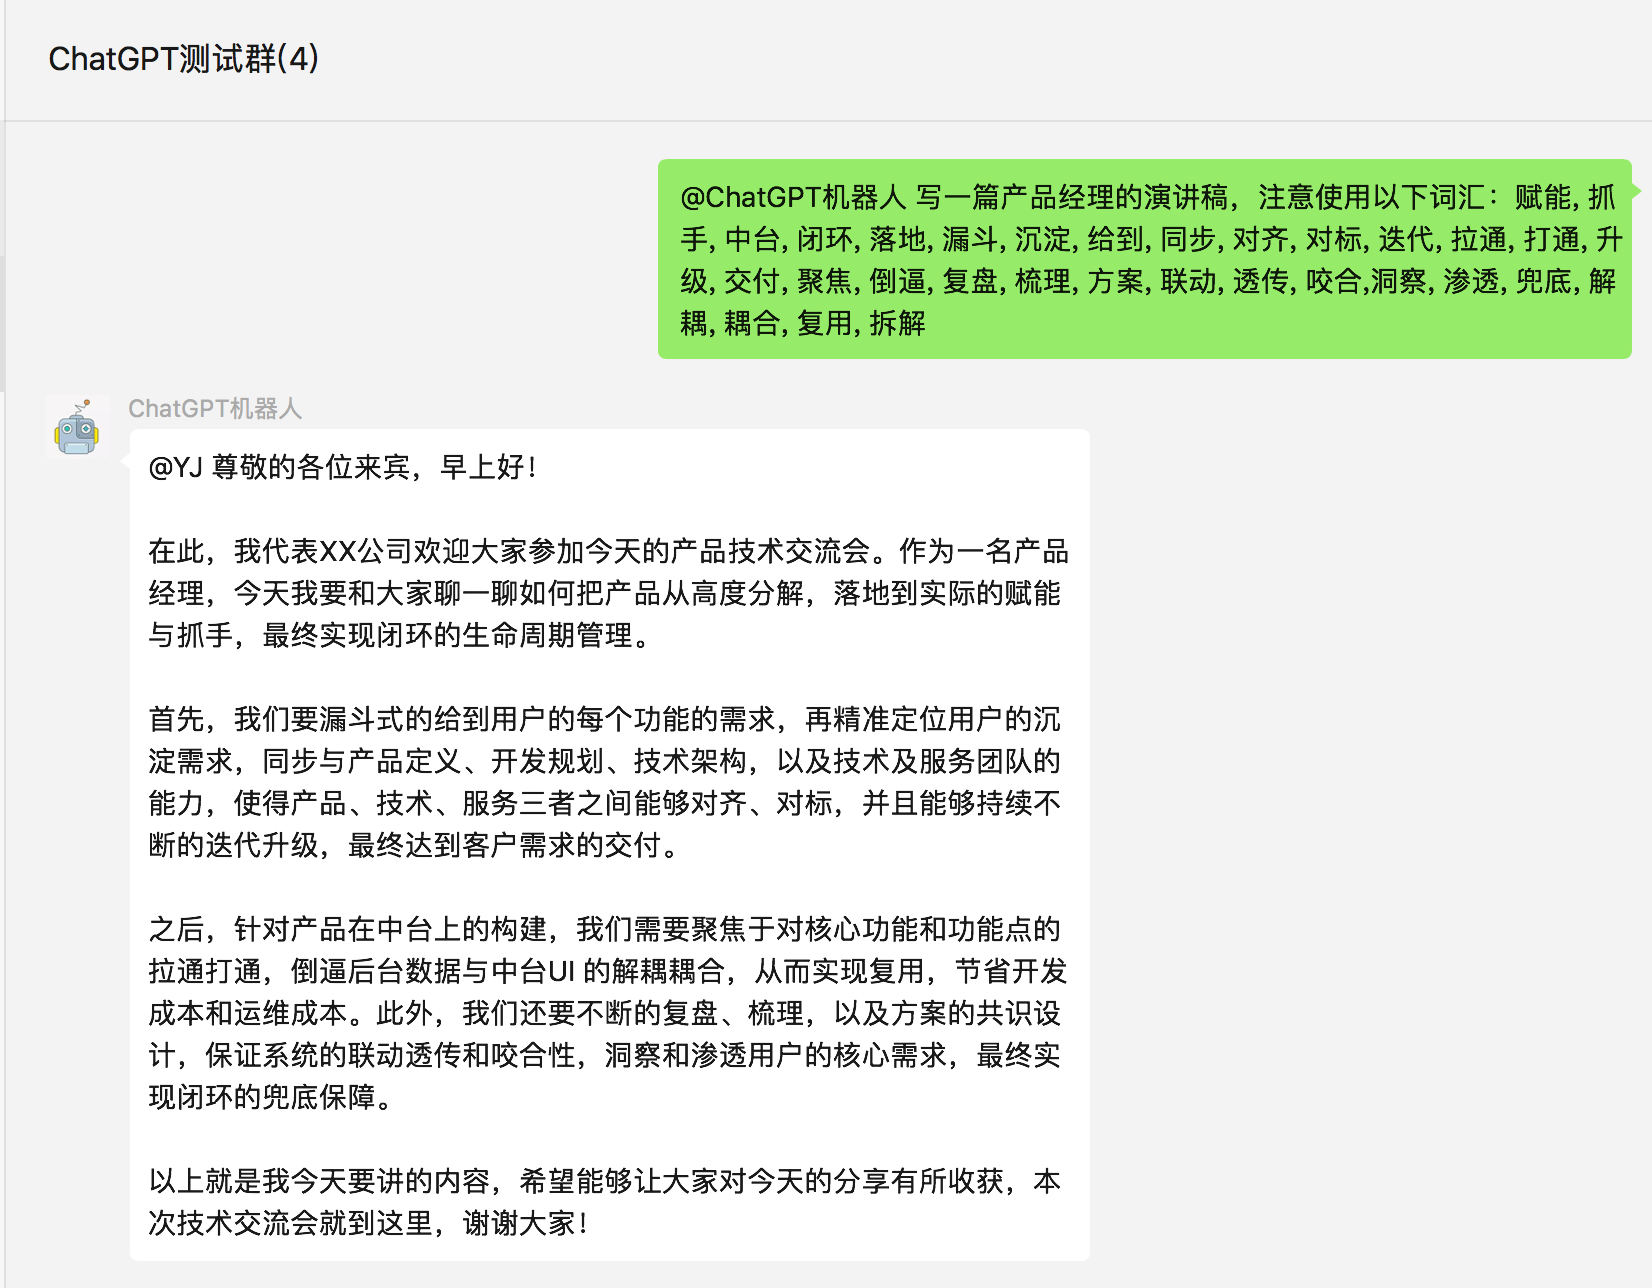
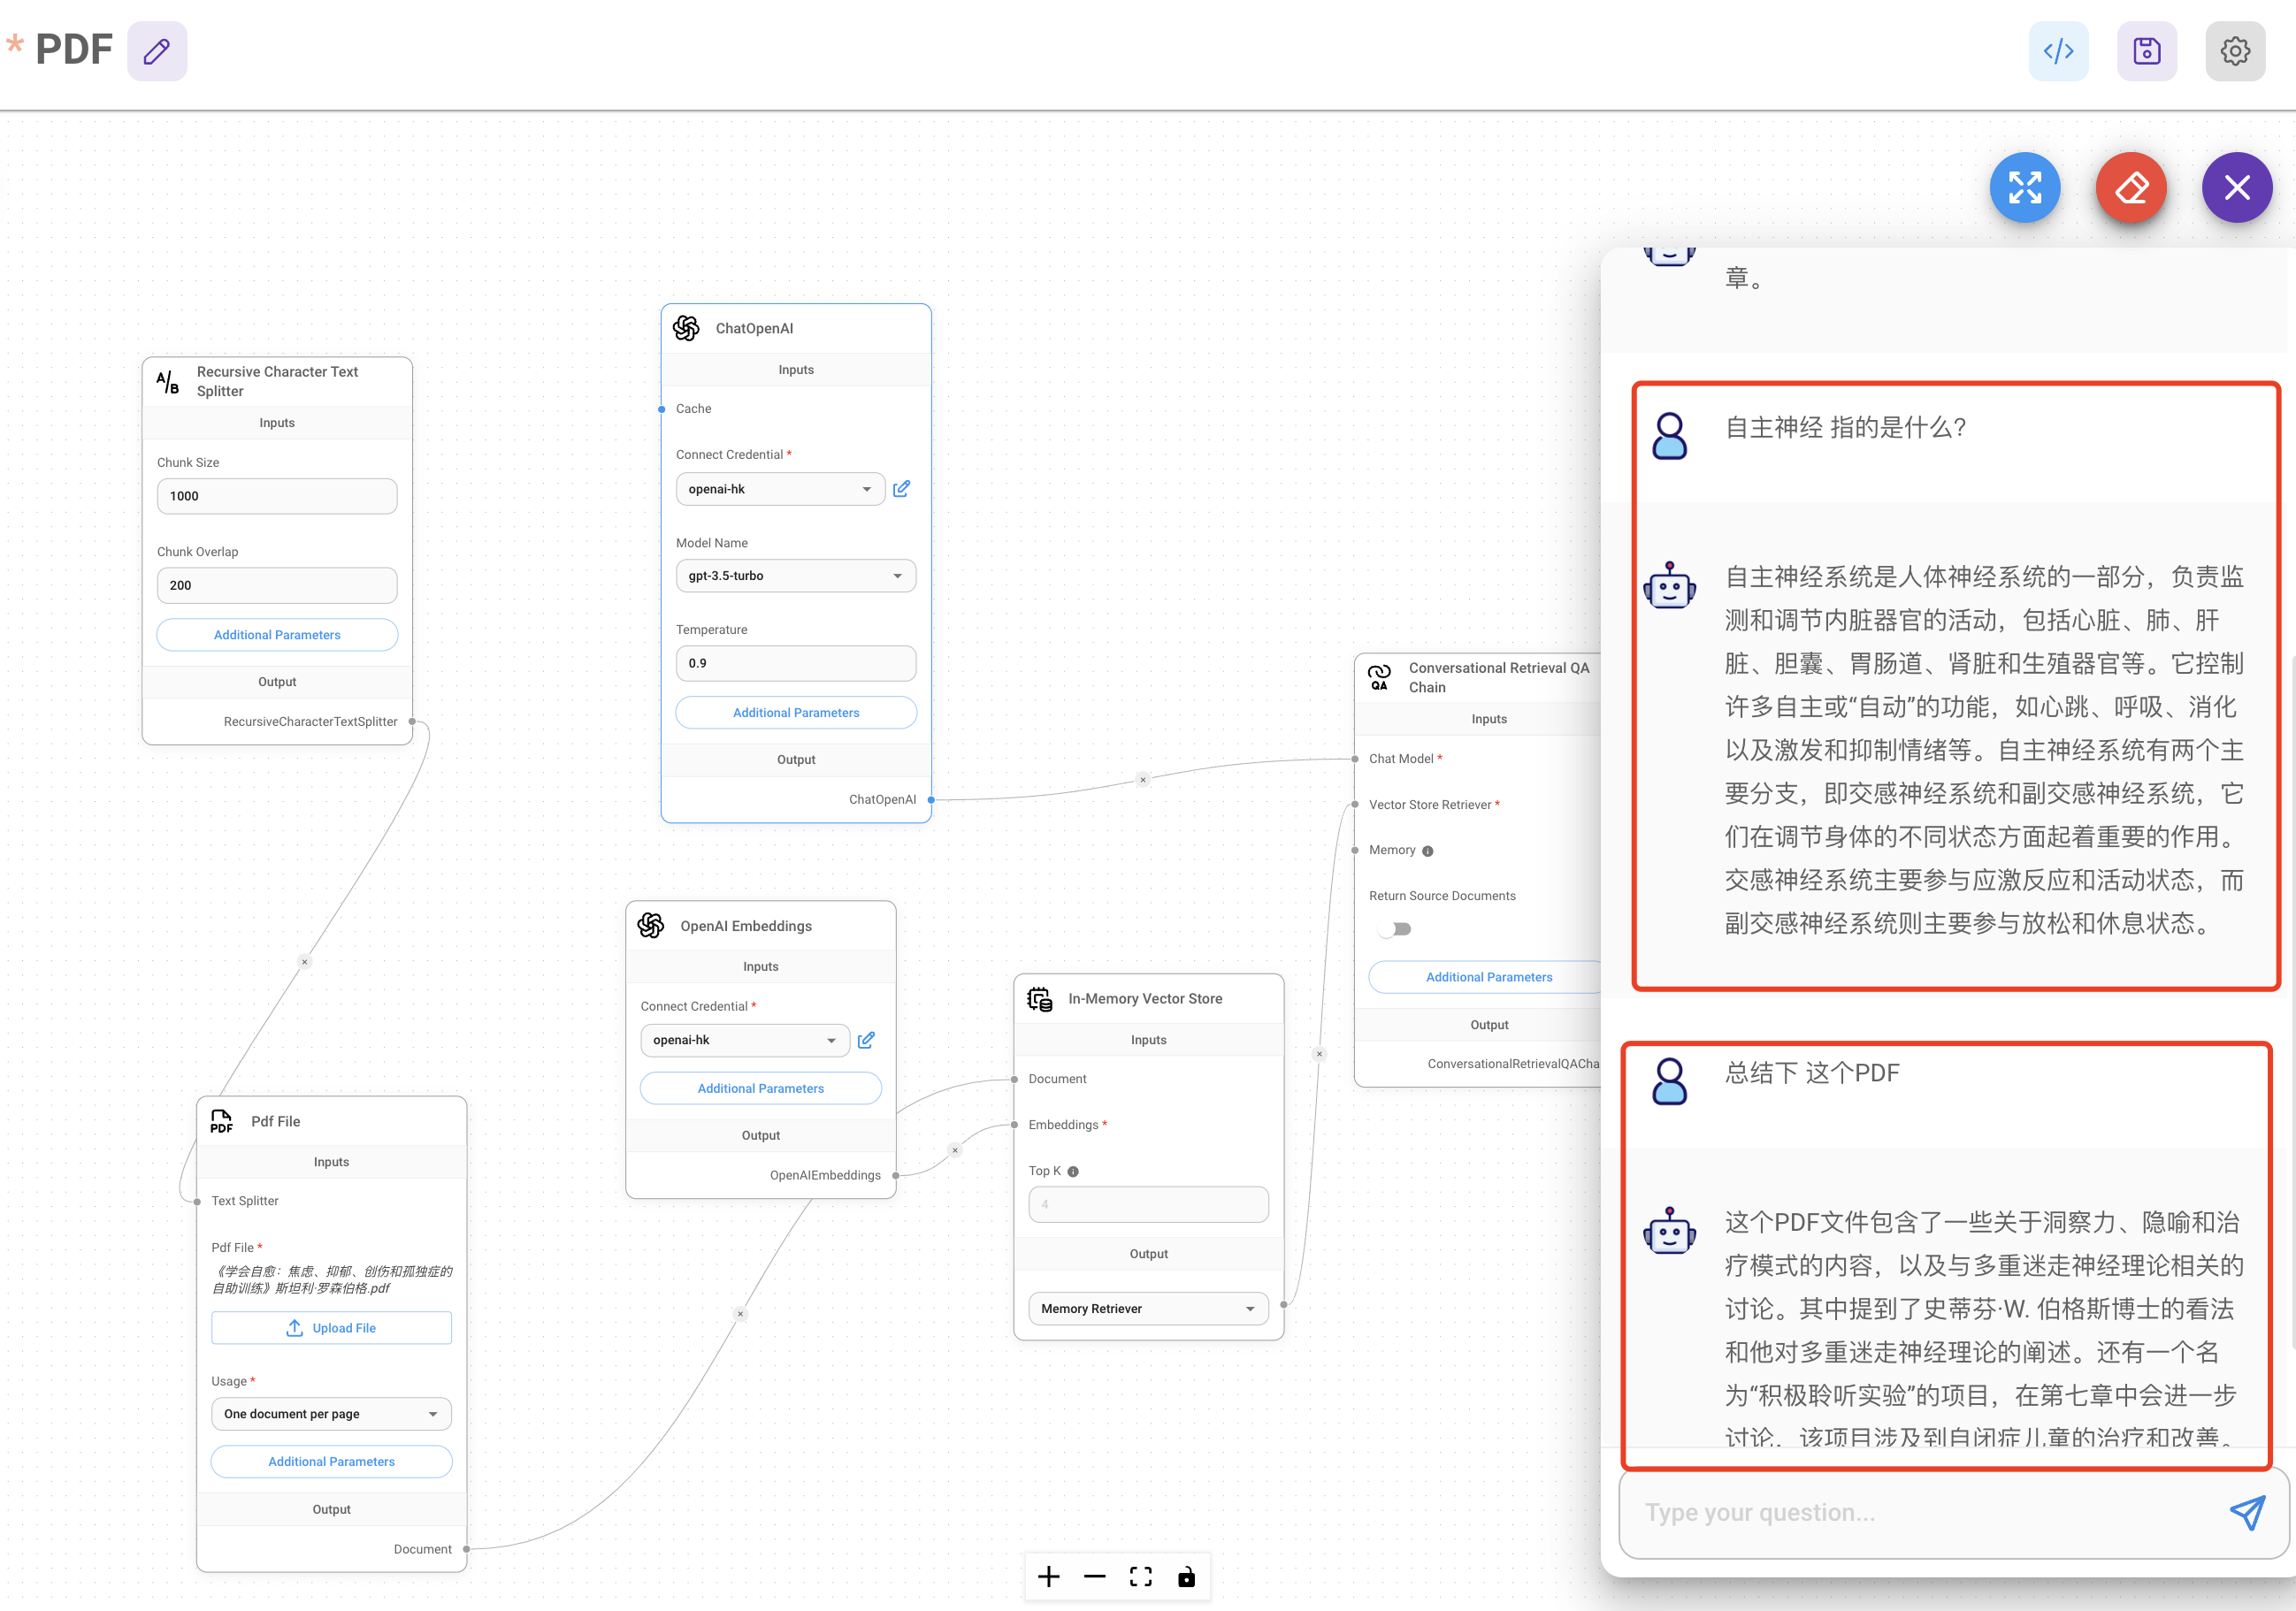
9. Flowise
- Project repository Official site: flowiseai.com
- Code: https://github.com/FlowiseAI/Flowise
- Build your own large language model application
- Suitable for power users
- Final result shown below
 Installation
docker pull flowiseai/flowise #not needed on first install, needed for updates
docker rm -f flowise #not needed on first install, needed for updates
docker run --name flowise  -d -p 3070:3070  --restart=always \
-e PORT=3070  \
-e DATABASE_PATH=/root/.flowise \
-e APIKEY_PATH=/root/.flowise \
-e SECRETKEY_PATH=/root/.flowise \
-e LOG_PATH=/root/.flowise/logs \
-v ~/.flowise:/root/.flowise \
-e FLOWISE_USERNAME=hk \
-e FLOWISE_PASSWORD=hk123456 \
flowiseai/flowise /bin/sh -c "sleep 3; flowise start"
docker pull flowiseai/flowise #not needed on first install, needed for updates
docker rm -f flowise #not needed on first install, needed for updates
docker run --name flowise -d -p 3070:3070 --restart=always \
-e PORT=3070 \
-e DATABASE_PATH=/root/.flowise \
-e APIKEY_PATH=/root/.flowise \
-e SECRETKEY_PATH=/root/.flowise \
-e LOG_PATH=/root/.flowise/logs \
-v ~/.flowise:/root/.flowise \
-e FLOWISE_USERNAME=hk \
-e FLOWISE_PASSWORD=hk123456 \
flowiseai/flowise /bin/sh -c "sleep 3; flowise start"- Visit
http://yourip:3070 - Configure
Credentials
Create a new Credentials Set the
 key to your hk-your-key After saving, create a new chatFlow
 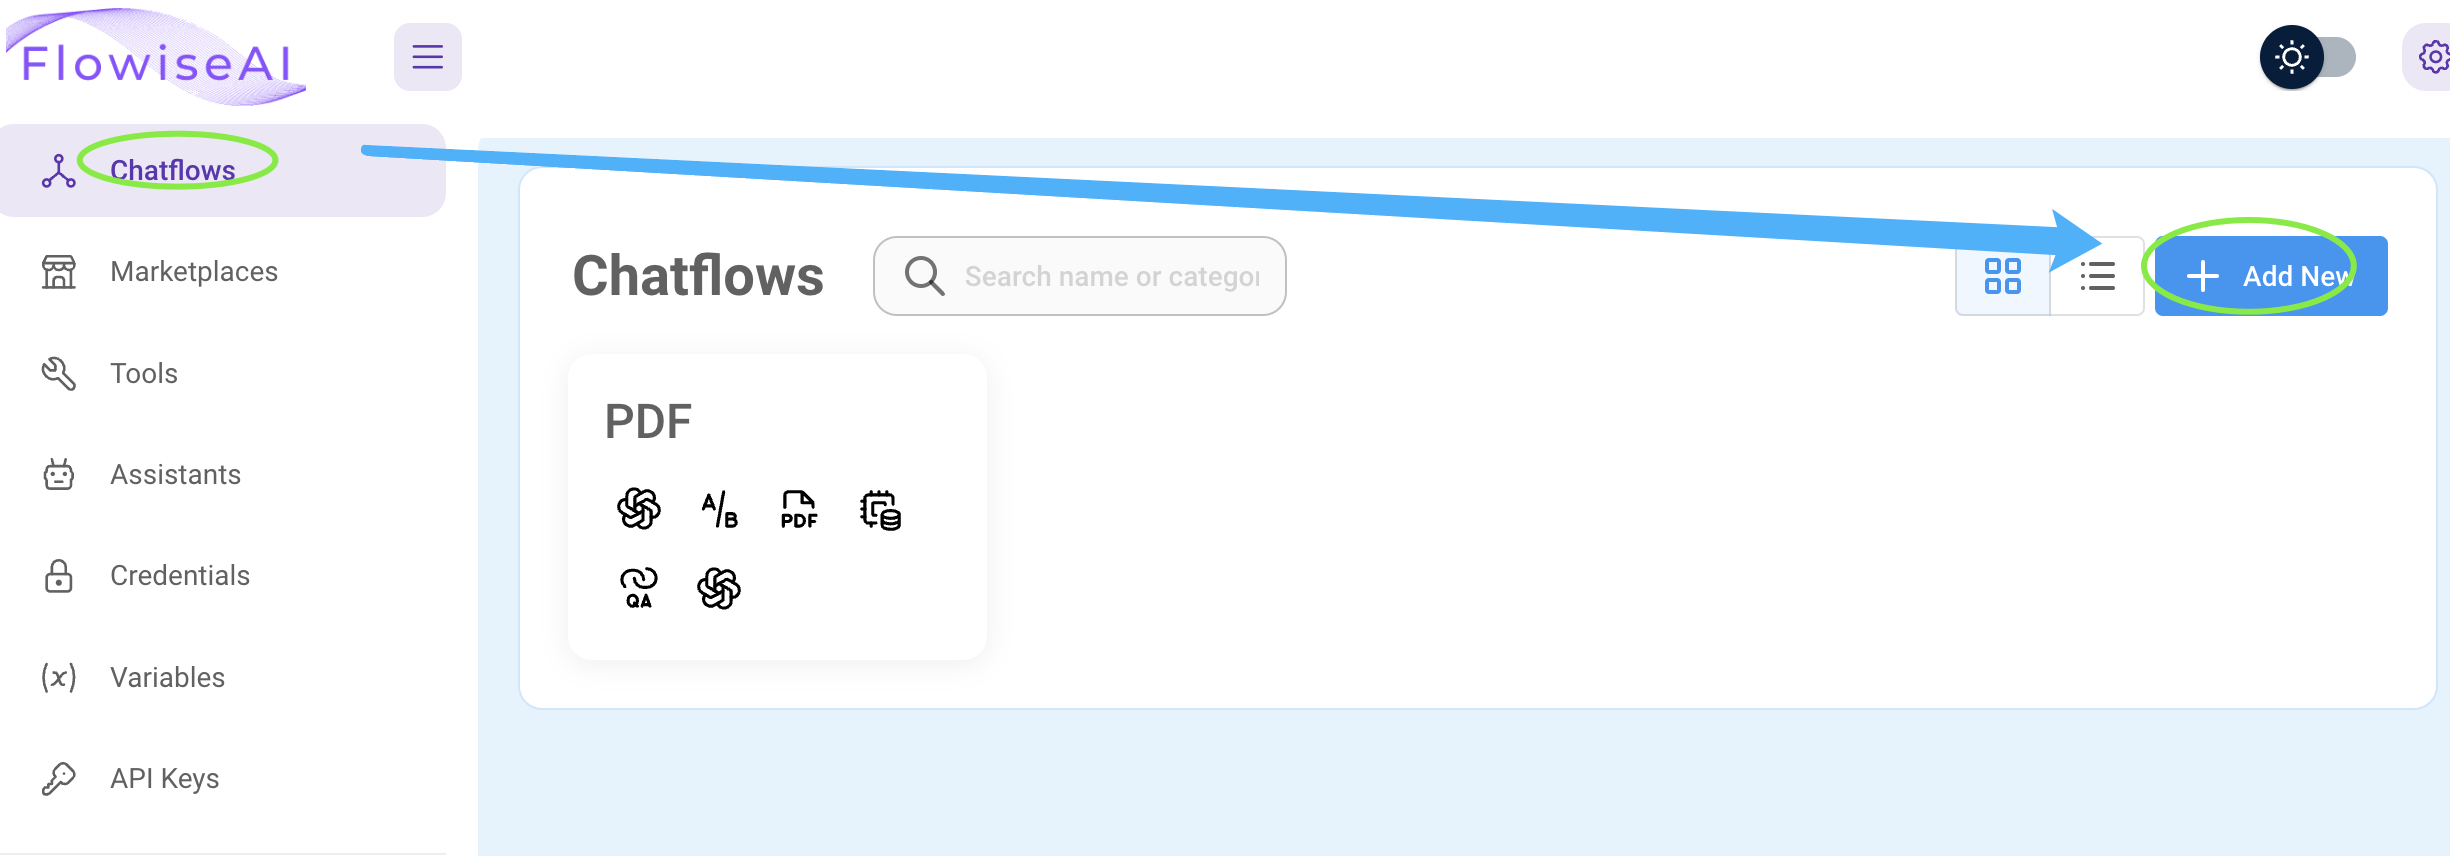 When configuring OpenAI-related settings, select the
 openai-hk key you just created 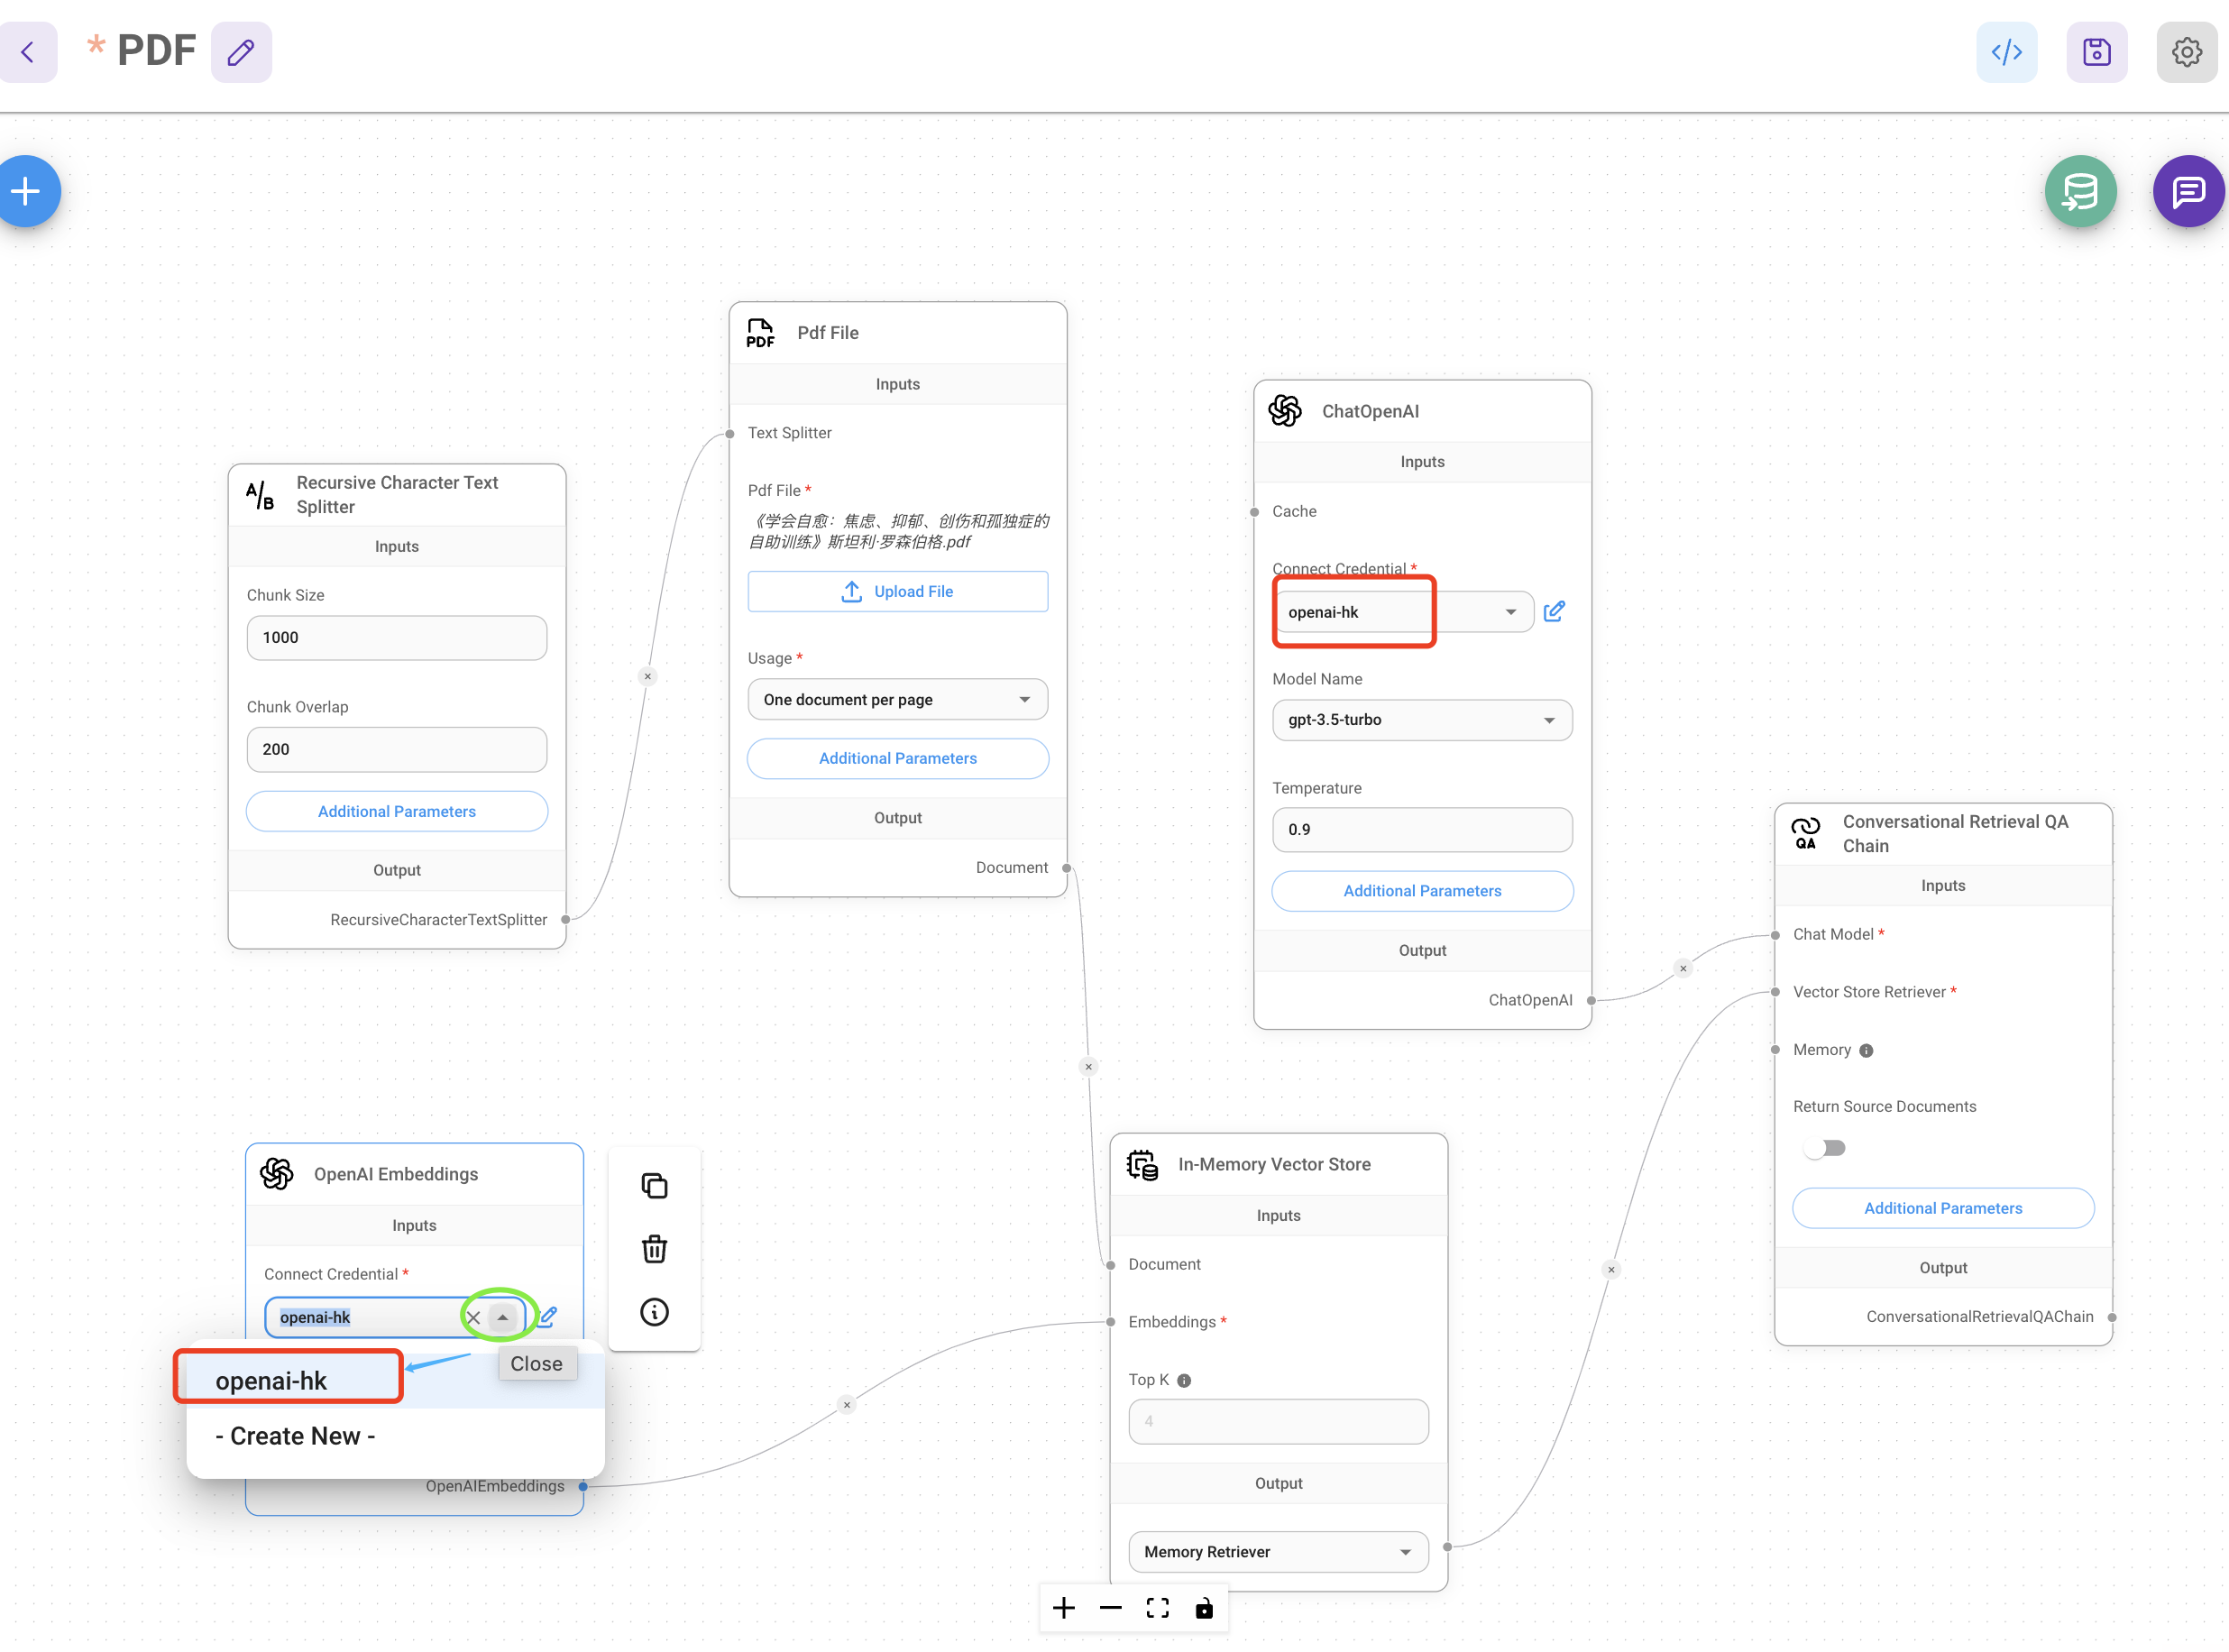 Set
Set basePath to https://api.openai-hk.com/v1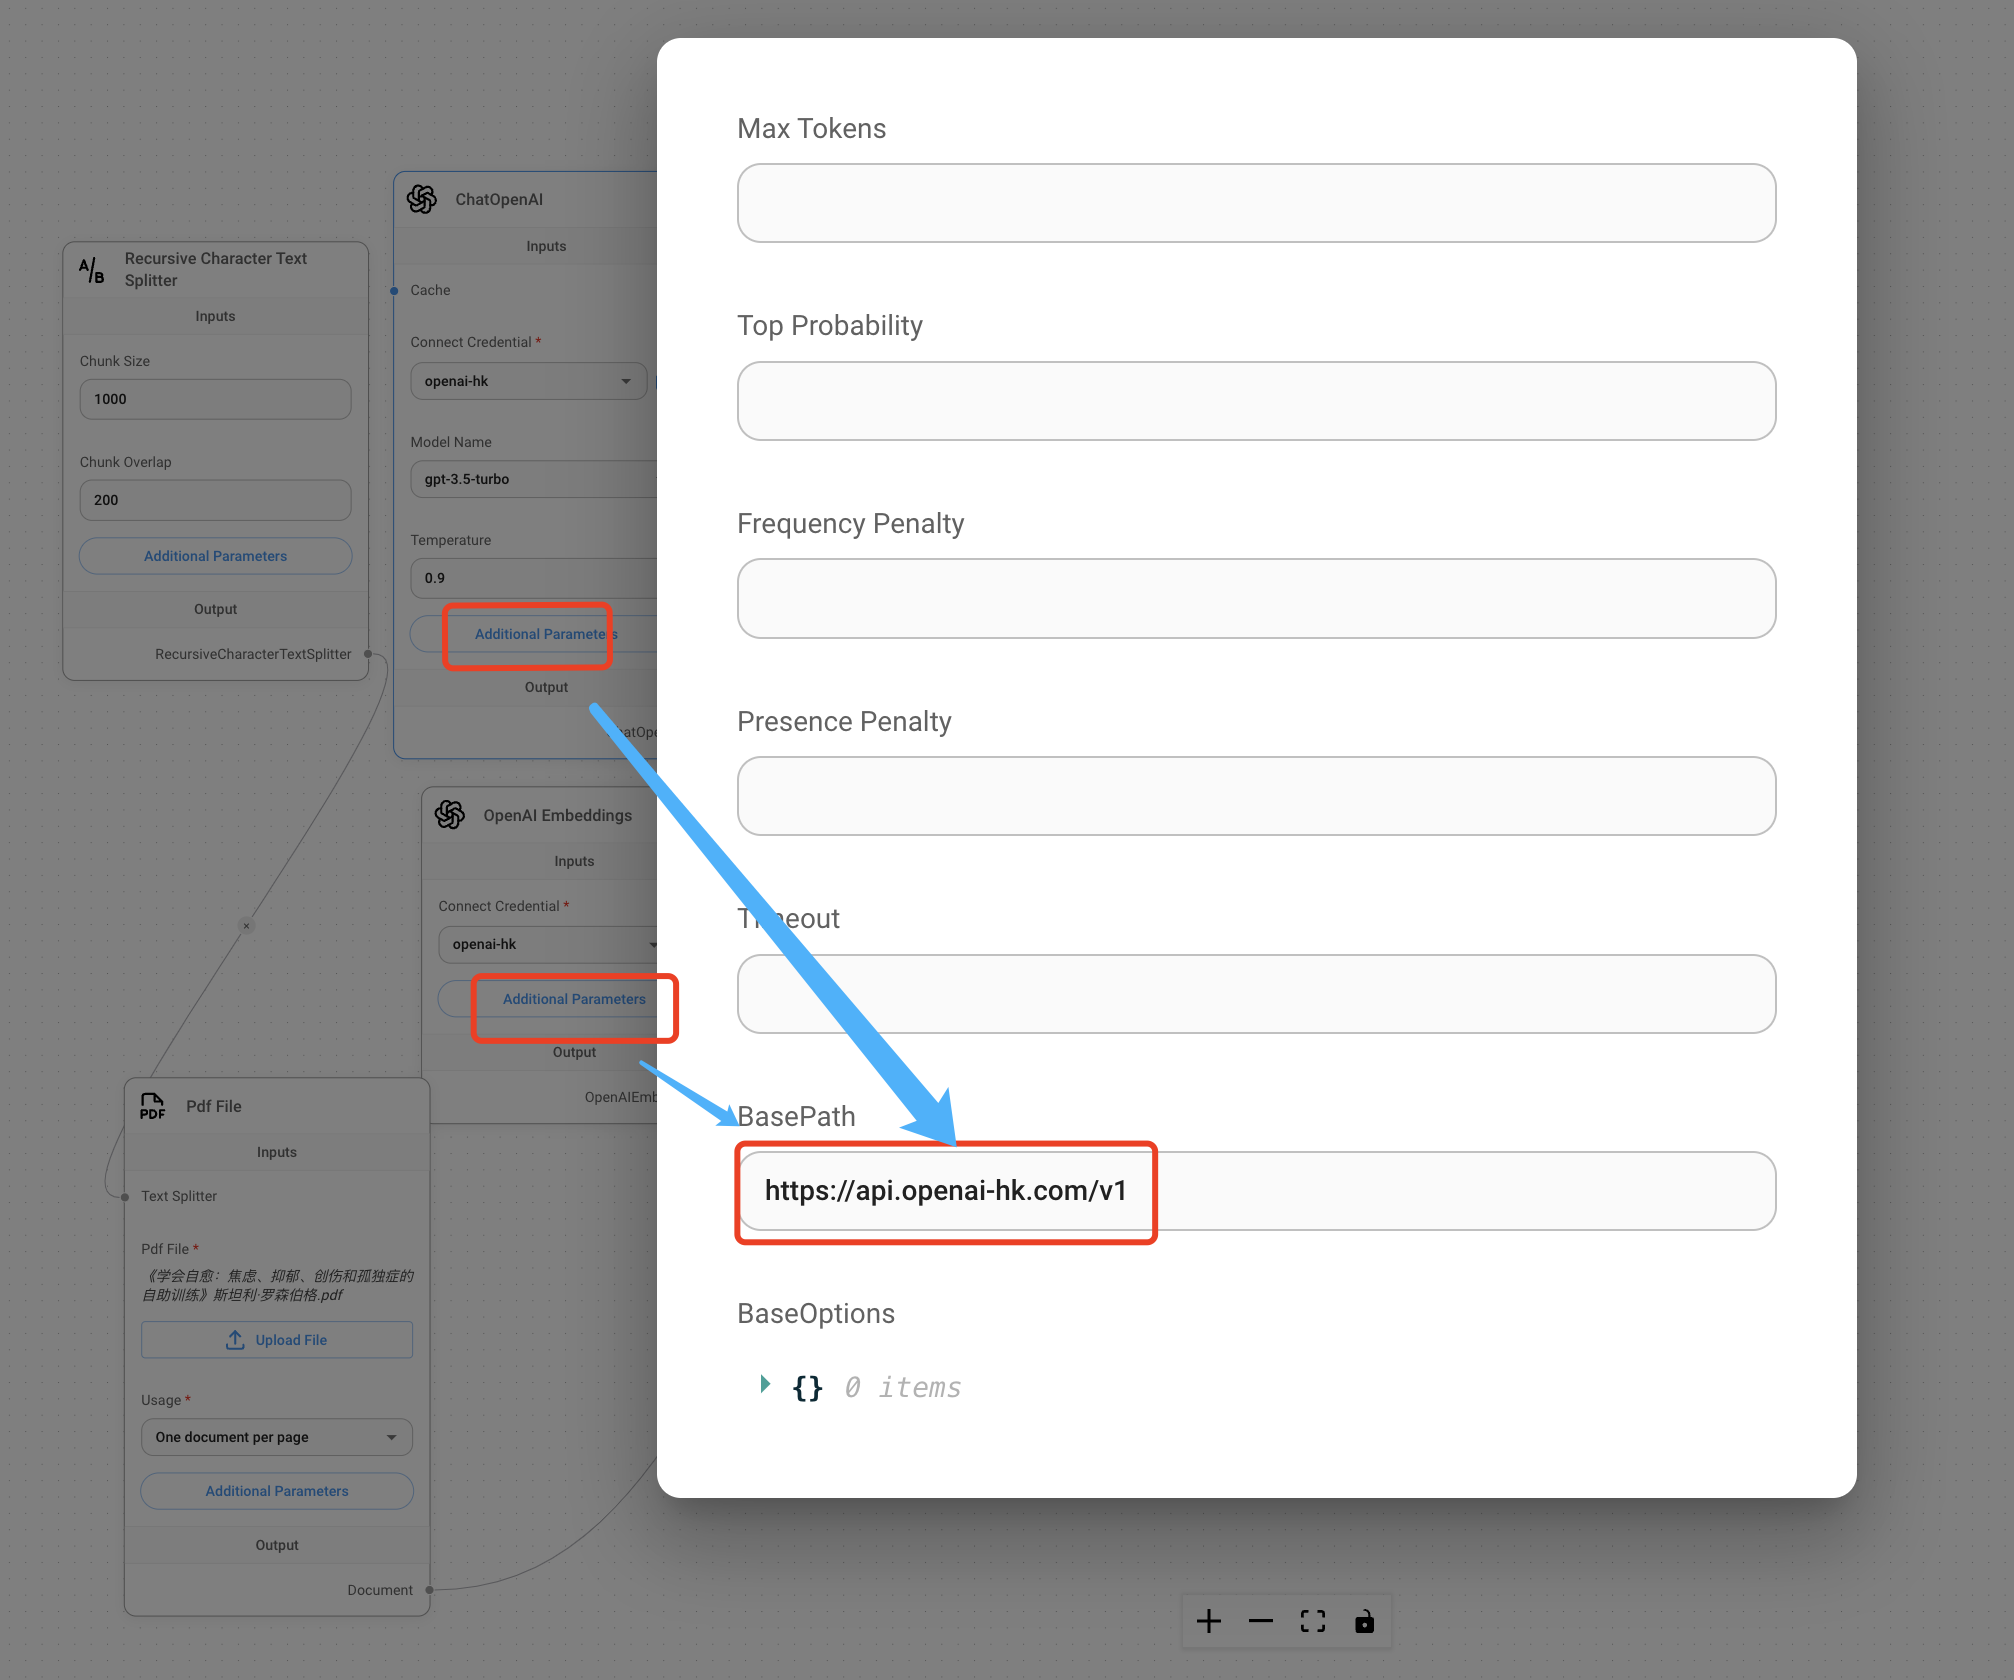 Final running result
10. Other
If you have other applications, please contact our customer support for assistance.